Getting Started
This guide walks you through installing Orbit OS on a supported device, accessing the Launcher, setting up your Store account, and registering your first device.
Orbit OS runs on top of your existing Linux installation — it does not replace your OS. You keep full control of the underlying system.
📋 Requirements
Supported hardware — Community Edition
- Raspberry Pi 3, 4, 5, or Zero 2W
- Arduino UNO Q (Qualcomm QRB2210) *
* GPIO handling not yet fully supported on the UNO Q — the HAL layer for this board is currently under development.
Linux Distro
- Debian 13 Lite (Trixie) (recommended)
- Must be accessible over the local network
Before you begin
- Know the IP address of your device
- SSH, SCP, or FTP access to the device
- At least 256 MB of available RAM
- Internet connection on the device (for first-run dependency installation)
⬇️ Download & Install
orbit-os-26-installer.run
Community Edition · ARM64 · ~30 MB
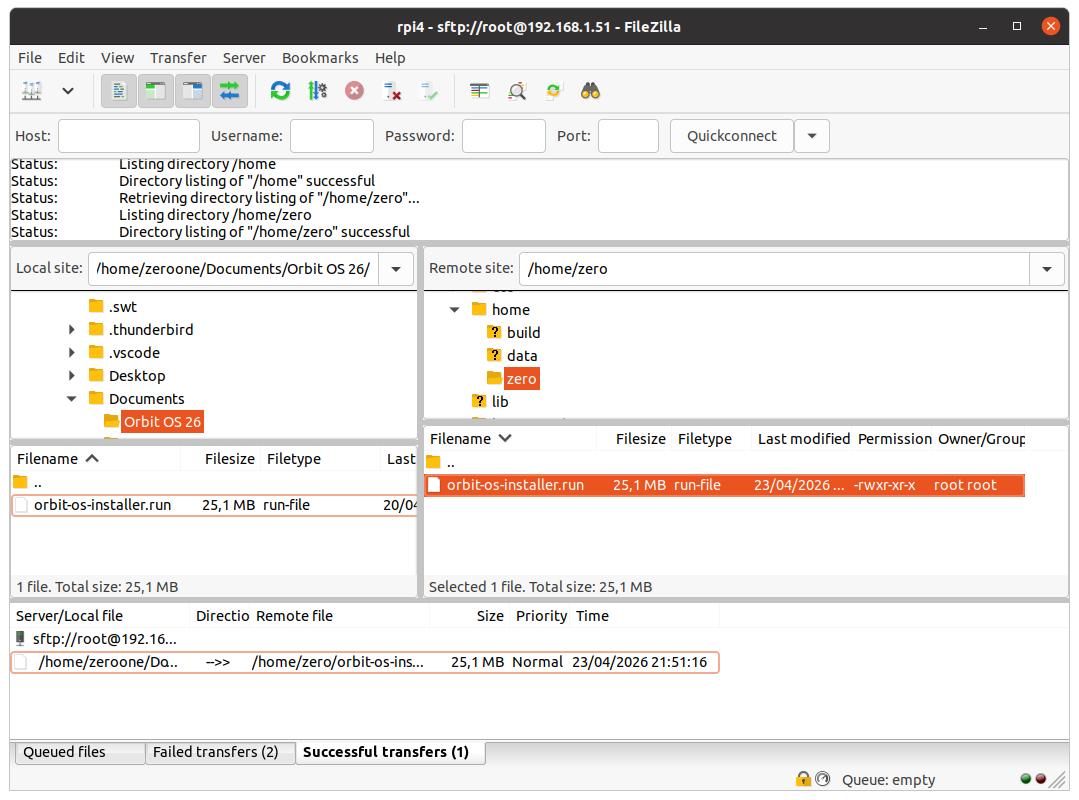
Step 1 — Transfer the installer to your device
Transfer the installer to your device. You can use SCP from the terminal or a graphical tool like FileZilla.
Via terminal (SCP):
scp orbit-os-installer.run user@<device-ip>:~/Via FileZilla:
Step 2 — Make it executable
sudo chmod +x orbit-os-installer.runStep 3 — Run the installer
sudo ./orbit-os-installer.run
The installer sets up Gravity RT, mounts the required directories, and configures the runtime automatically.
On first run, it installs dependencies (JVM, etc.) via apt — this only happens once.
Step 4 — Device restarts
Once the installation is complete, the device restarts Gravity RT automatically. After a few seconds, your device is running Orbit OS and ready to use.
🖥️ First Access — Launcher
After installation, open a browser on any device on the same local network and navigate to:
http://<device-ip>This is the Launcher — the central interface for your Orbit OS device. It shows all installed apps and gives you access to device settings and other installed apps.
The Launcher always requires a Device Login. On first access, use the default credentials:
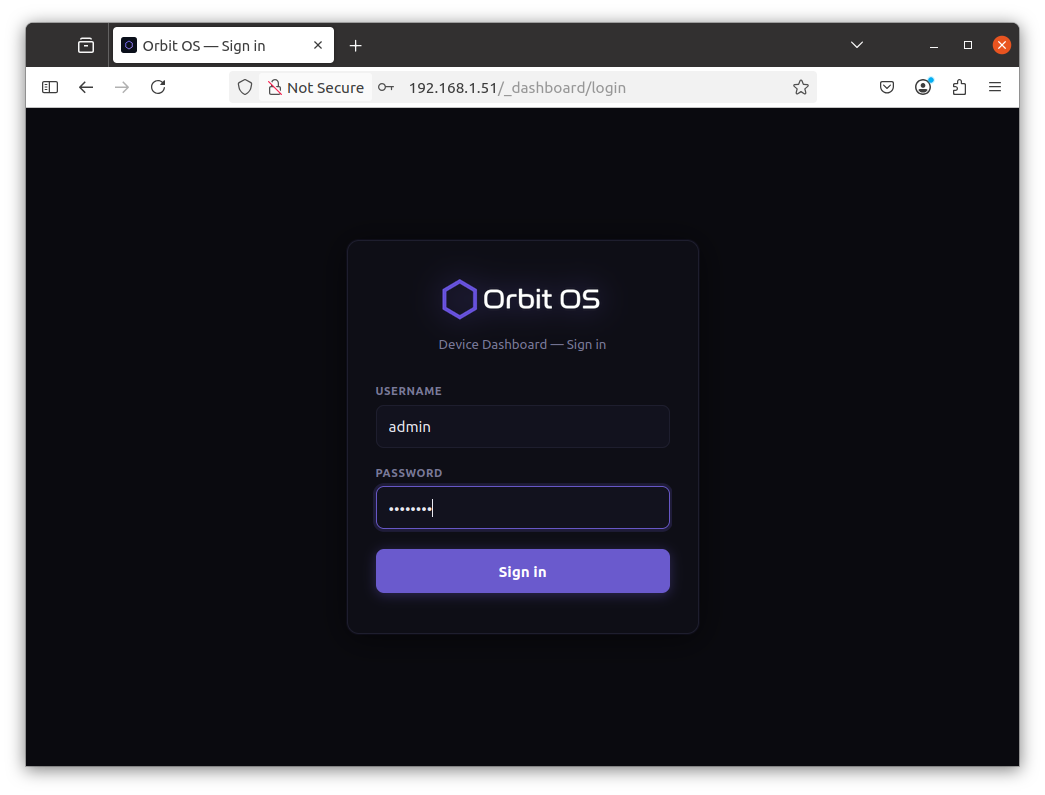
- Username:
admin - Password:
admin
On first login, you will be immediately prompted to change your password. This step is mandatory before you can proceed.
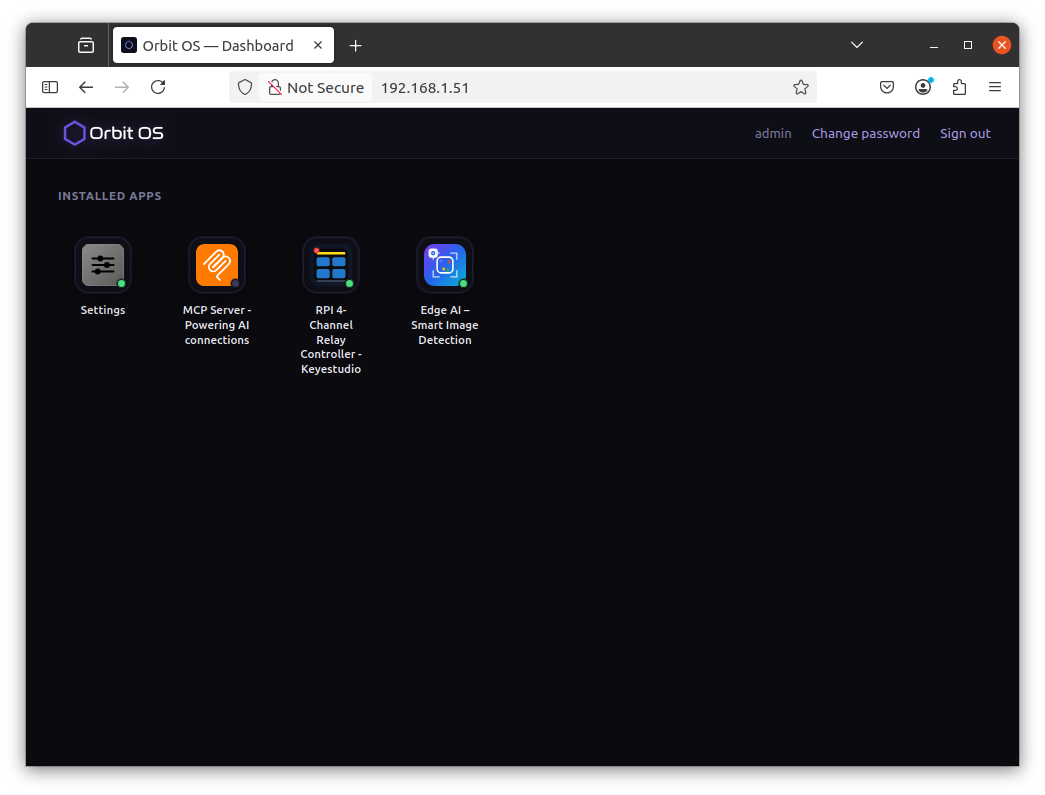
The Launcher shows the icons of all installed apps. Click any icon to open that app directly in the browser — no additional software or client needed. Apps with a web interface open their own UI instantly.
- Settings — always present, gives you access to device configuration and Developer Mode
- Each installed app appears as its own icon — click to open
- As you install more apps from the Store, their icons appear here automatically
⚙️ Settings
Clicking the Settings icon in the Launcher opens the device settings panel.
The left-side menu gives you access to all configuration areas of your device: System, Network, Apps, Firewall, Account, Power, and About. A Developer menu also appears when Developer Mode is enabled.
If you want to go straight to development, skip ahead to Enable Developer Mode →
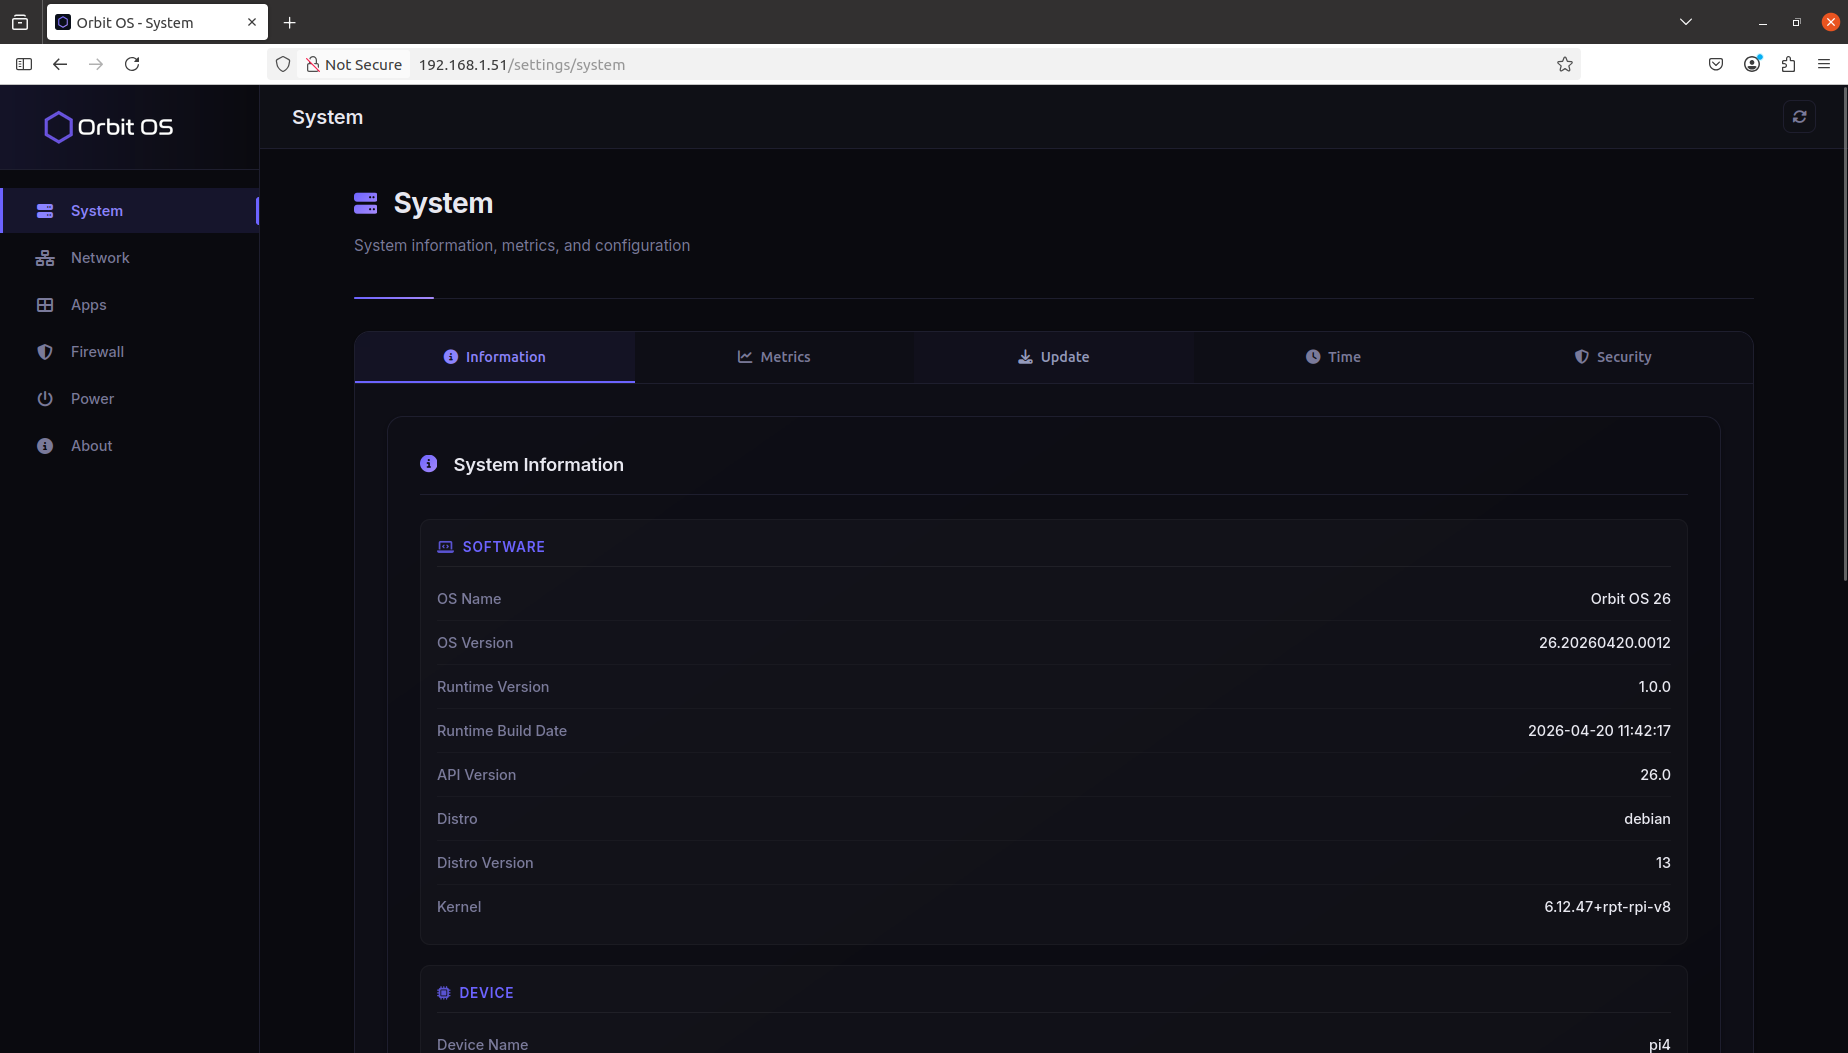
⚙️ Settings — System
The System section has five tabs: Information, Metrics, Update, Time, and Security.
System — Information
The Information tab shows a full snapshot of your device — software versions, hardware details, and processor information.
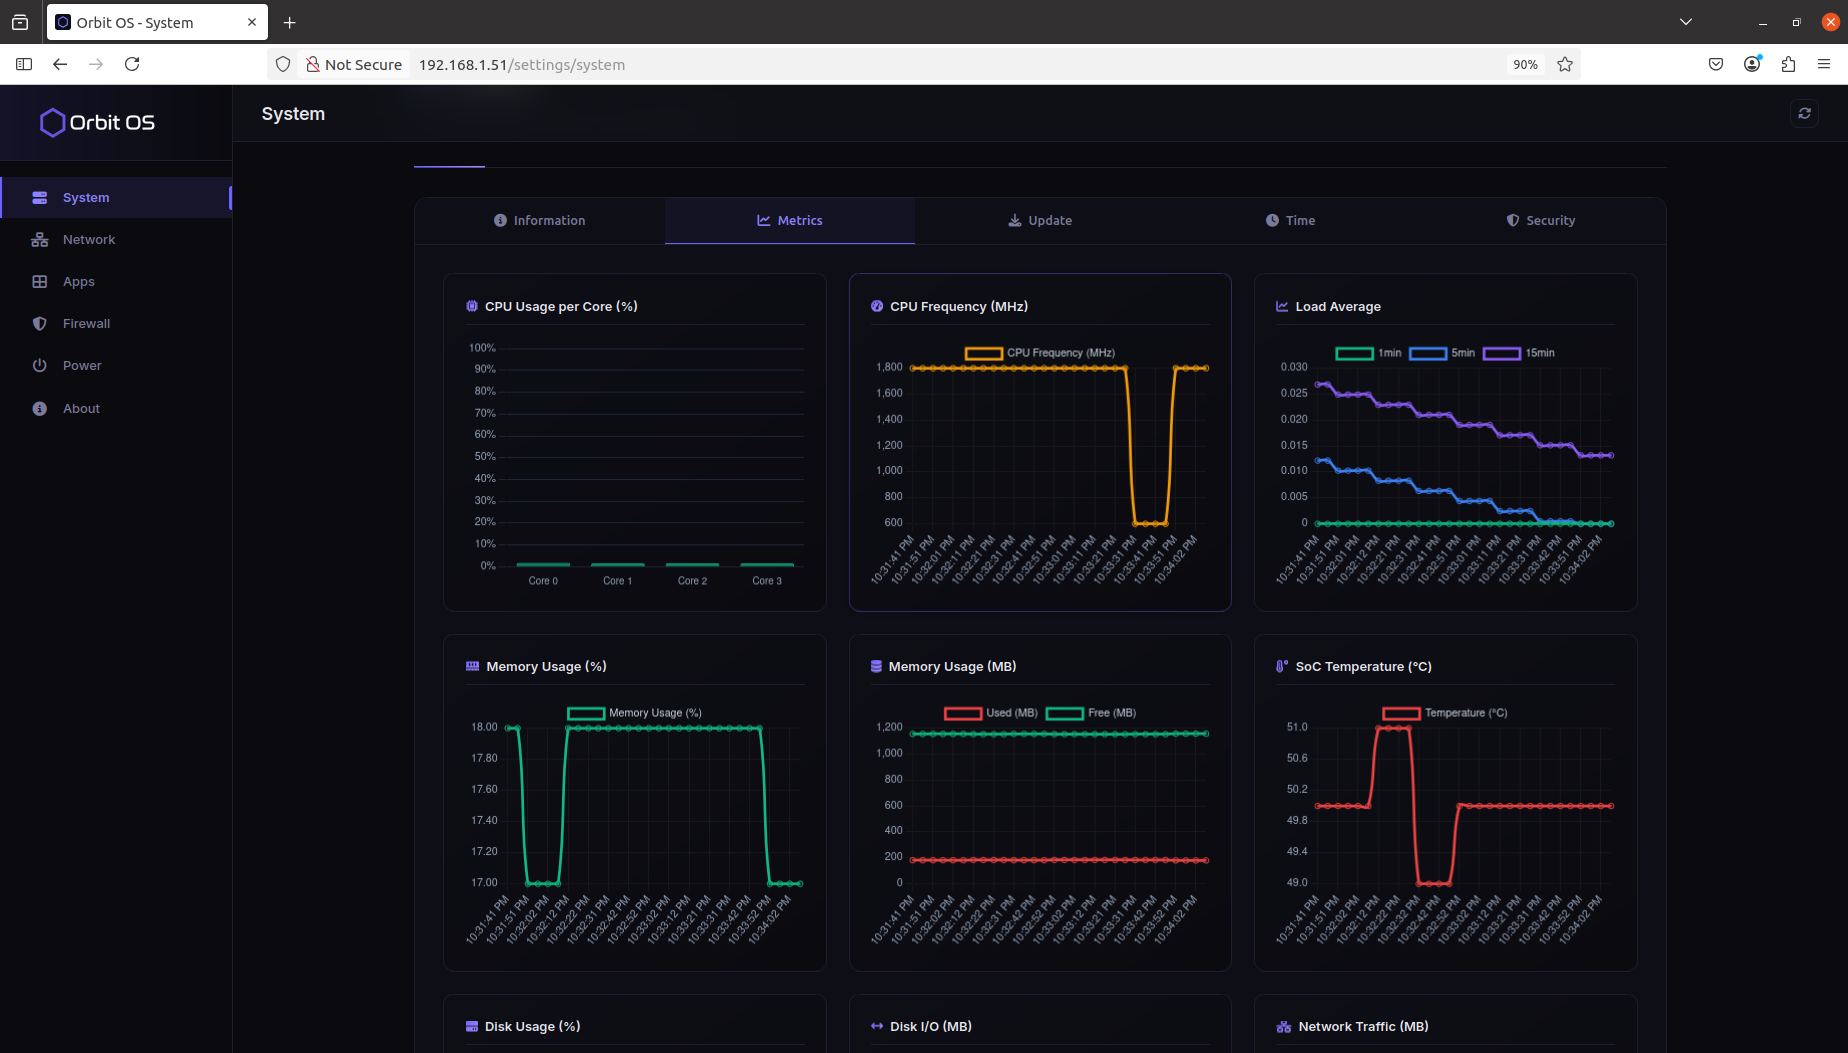
System — Metrics
The Metrics tab gives you a live view of your device's resource usage — useful for monitoring performance, diagnosing issues, and understanding the impact of running apps.
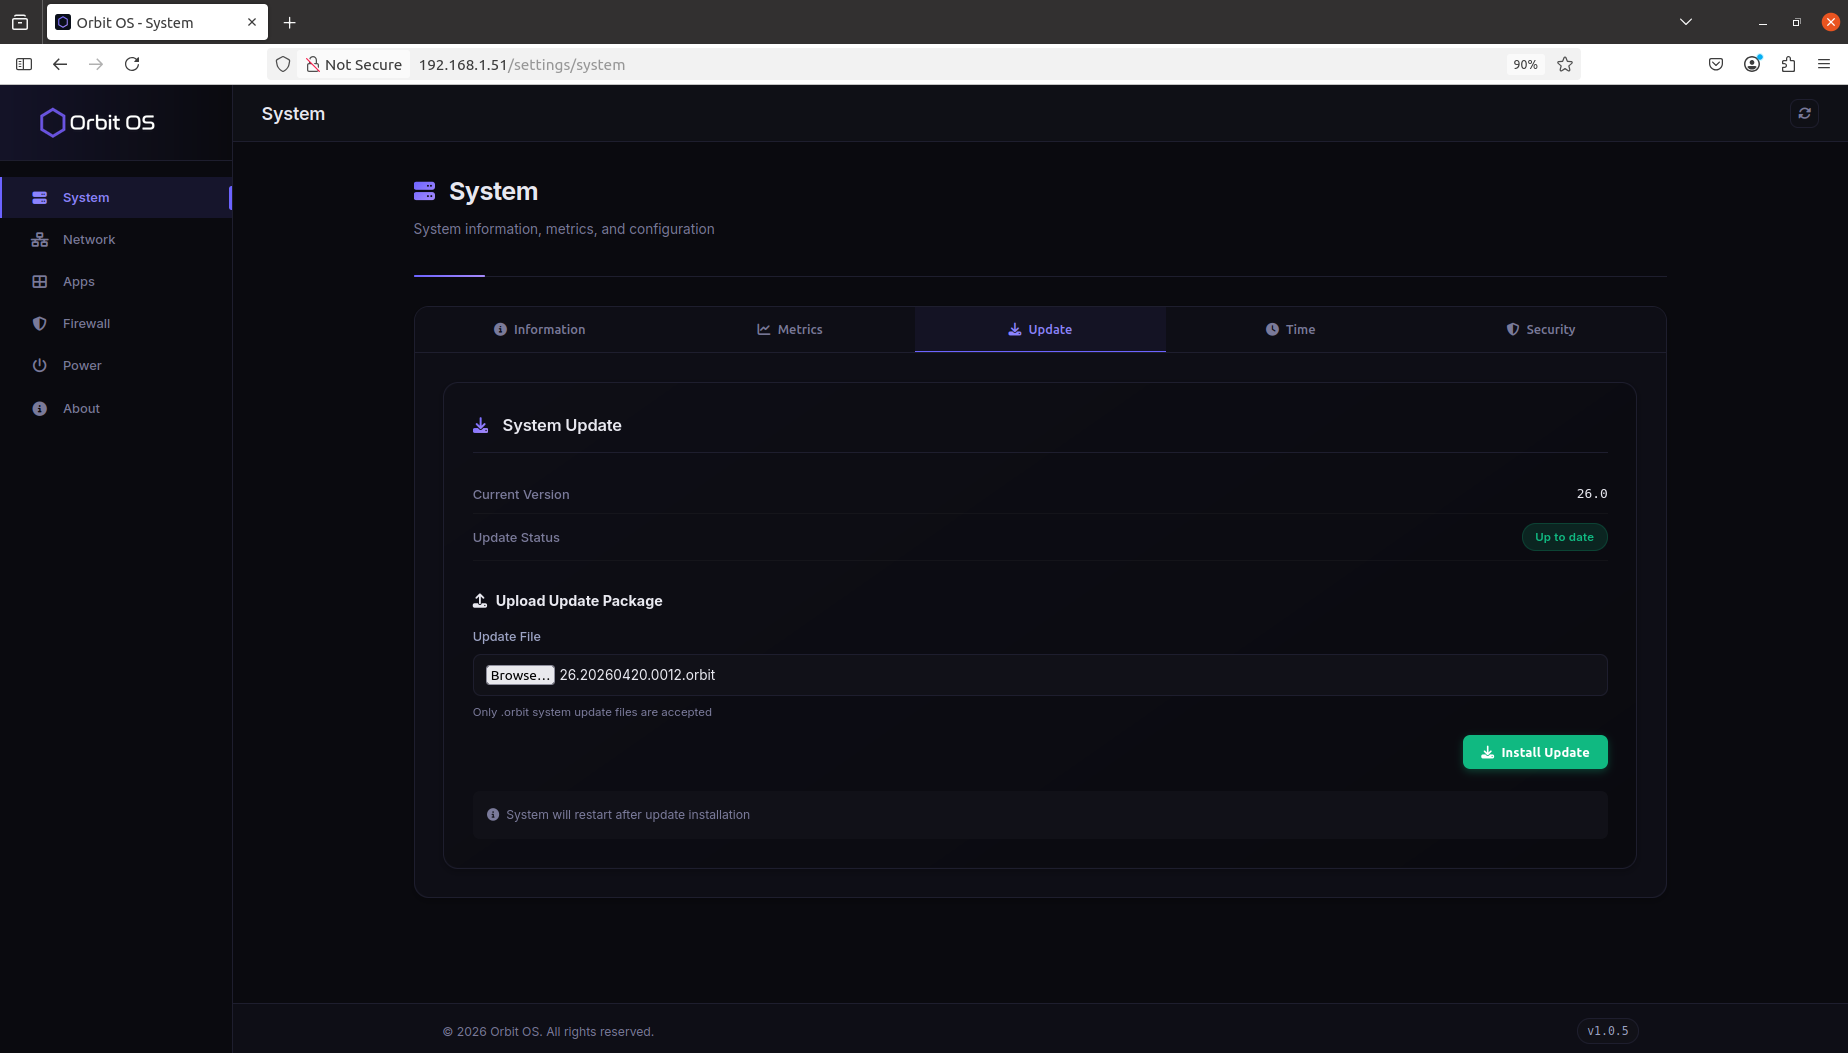
System — Update
The Update tab lets you apply a full Orbit OS runtime update directly from the device — no internet connection or Store account required. Updates are delivered as signed .orbit files.
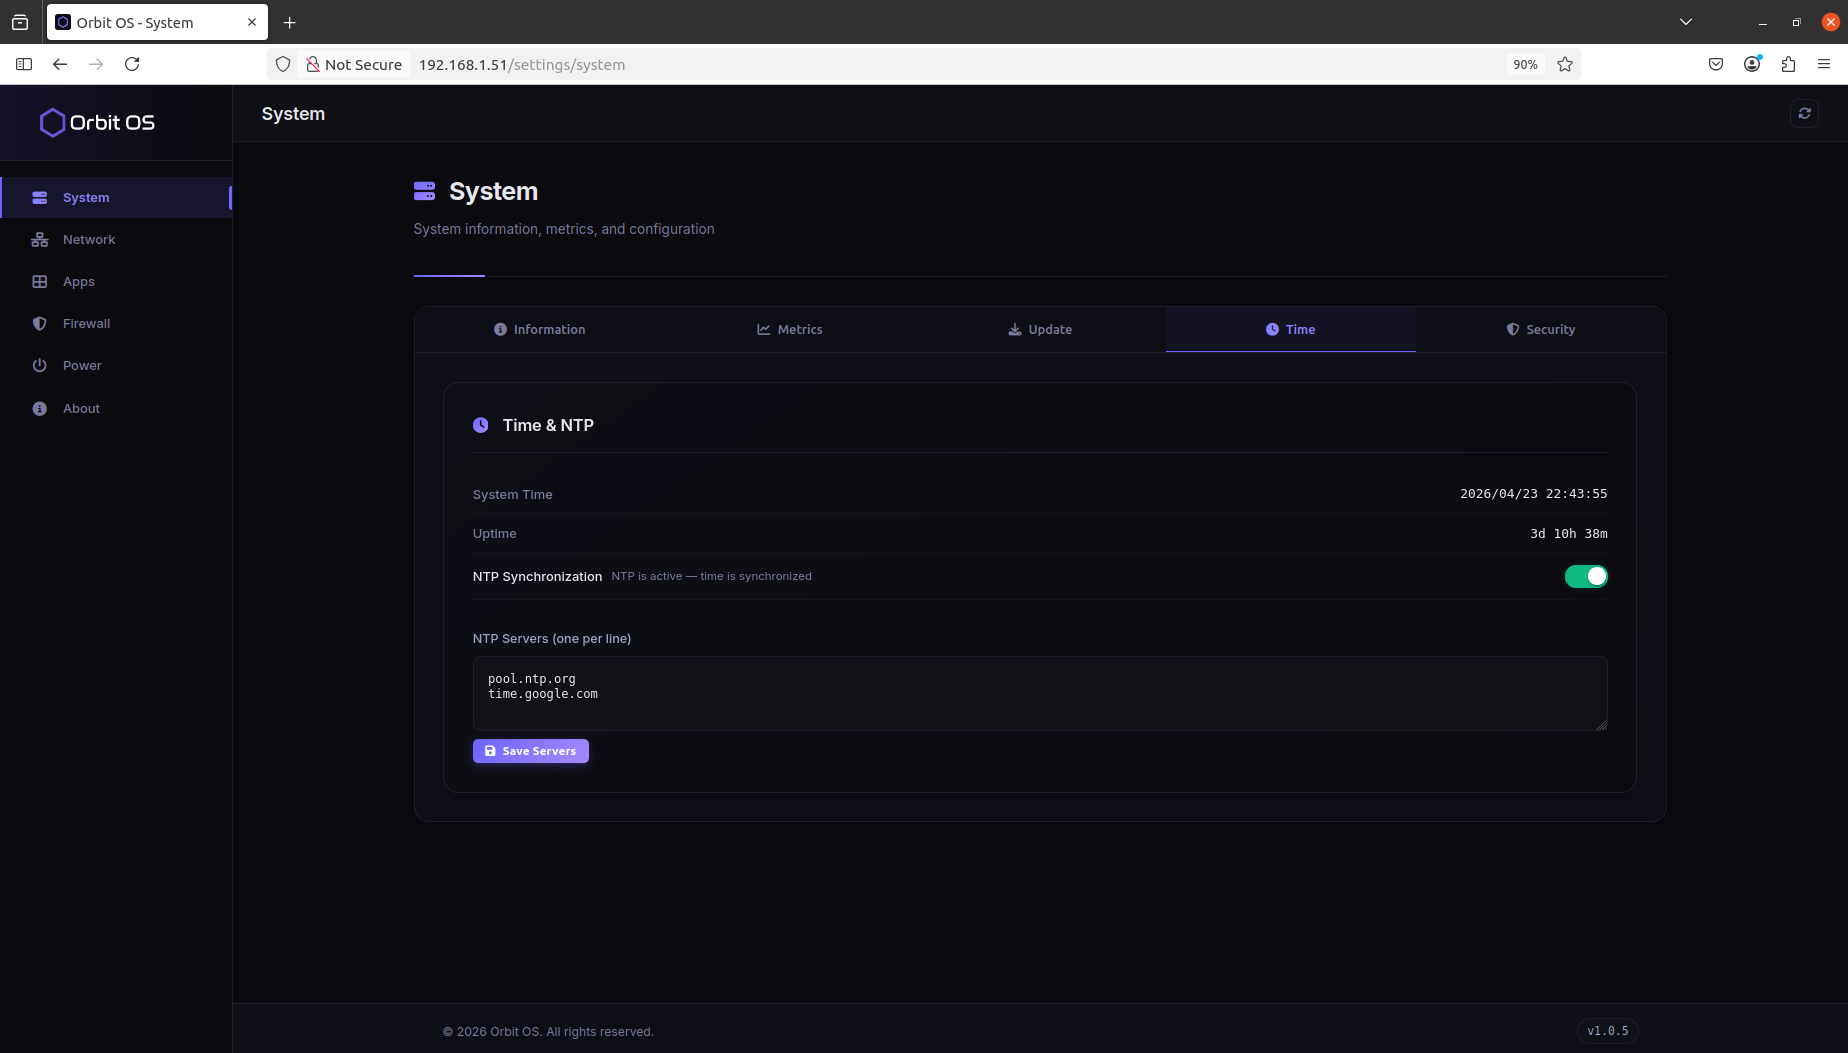
System — Time
The Time tab shows the current system time and uptime, and lets you configure NTP synchronization. You can set custom NTP servers to ensure the device clock stays accurate — one server per line.
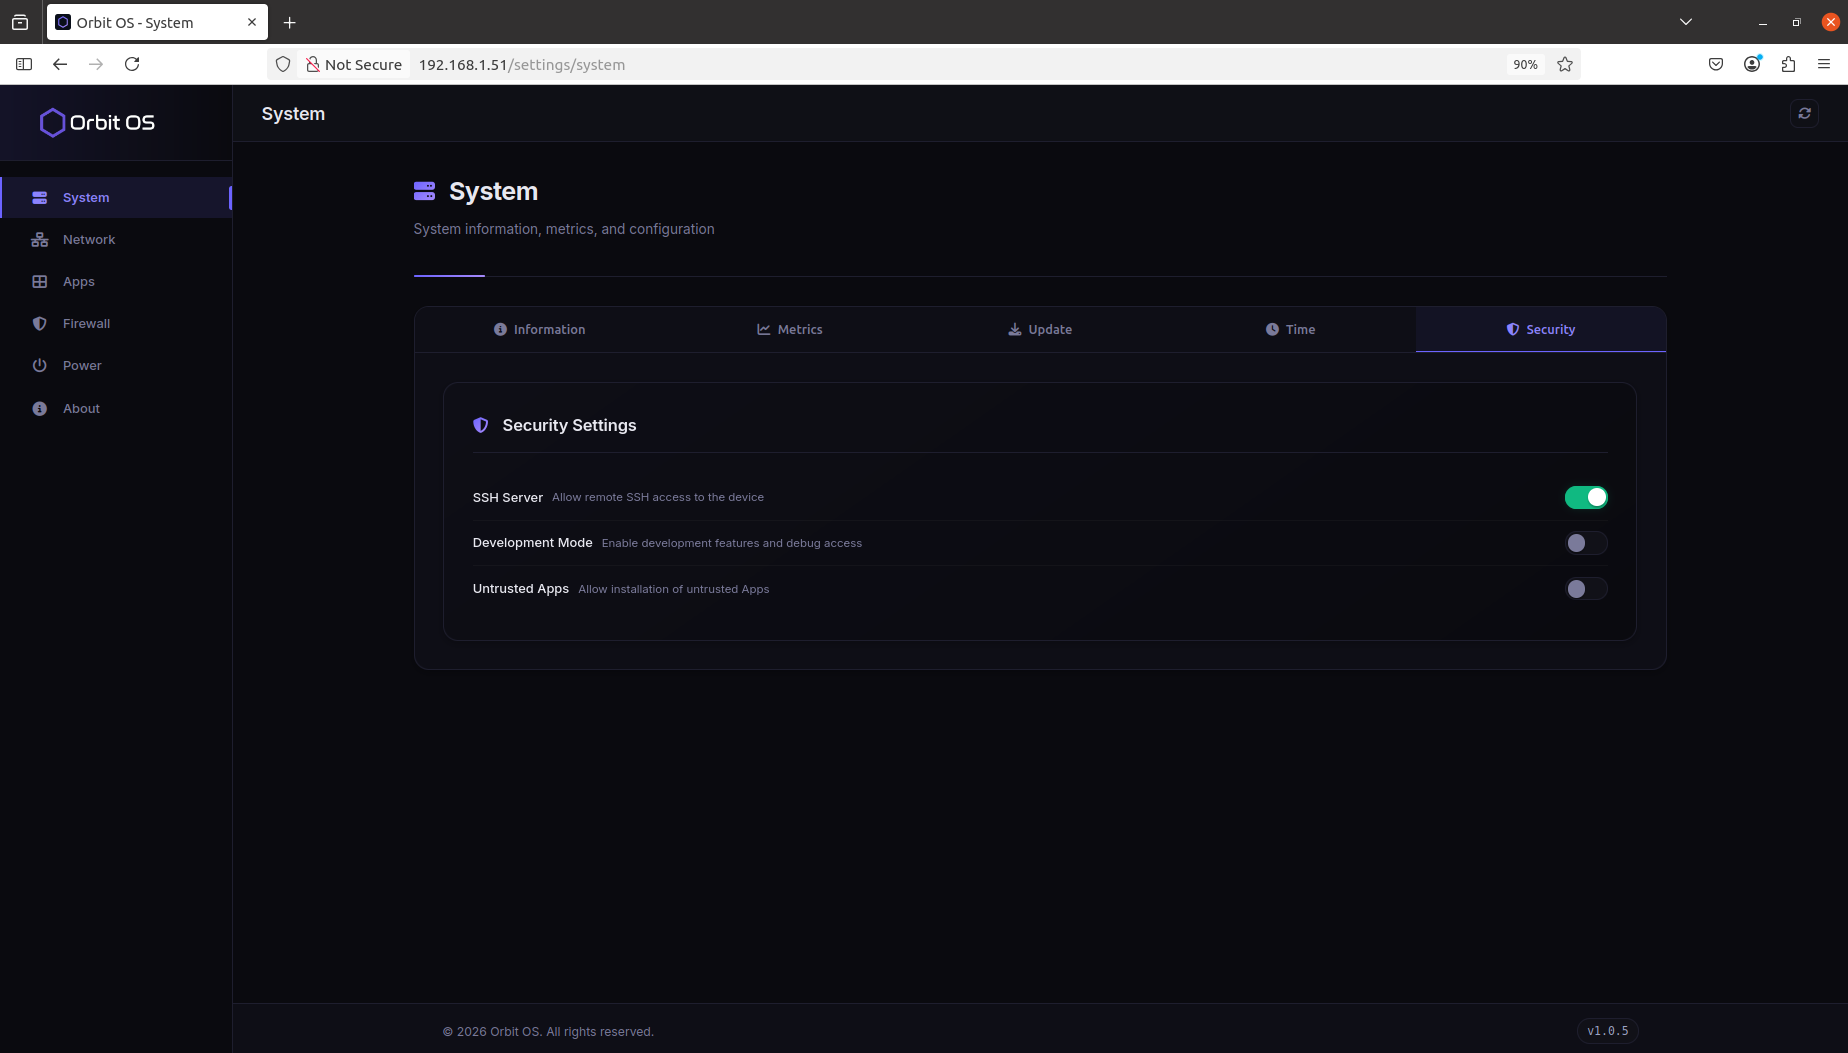
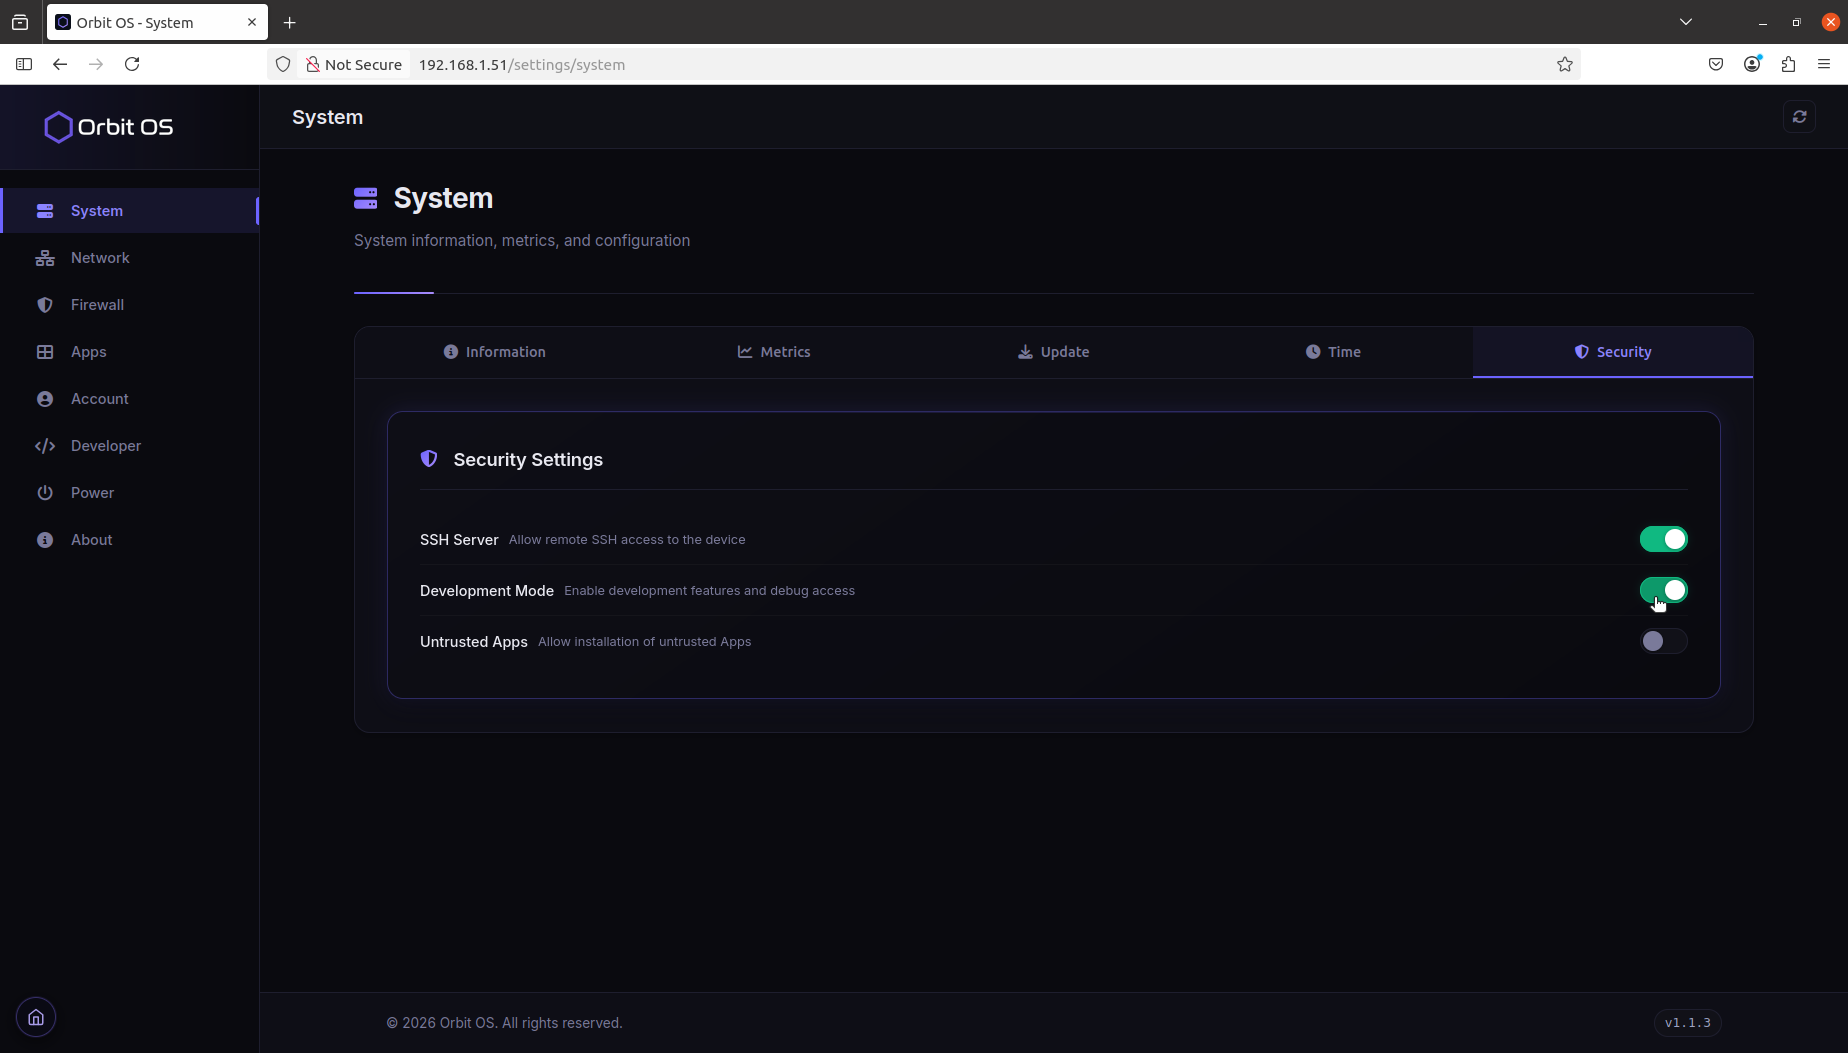
System — Security
The Security tab controls access and trust boundaries for the device. Three toggles define the device's exposure surface:
- SSH Server — allows remote SSH access to the device over the network.
- Developer Mode — enables the SDK connection and debug access from a development machine.
- Untrusted Apps — allows installation of
.orbpackages signed via the SDK. Store-signed packages are always considered trusted; this toggle is only required for packages distributed outside the Store.
⚙️ Settings — Network
The Network section lists all available network interfaces on the device as individual cards. Each card shows the interface name, type, and current connection status, and lets you configure it independently.
In the example below, two interfaces are available: Ethernet and Wi-Fi.

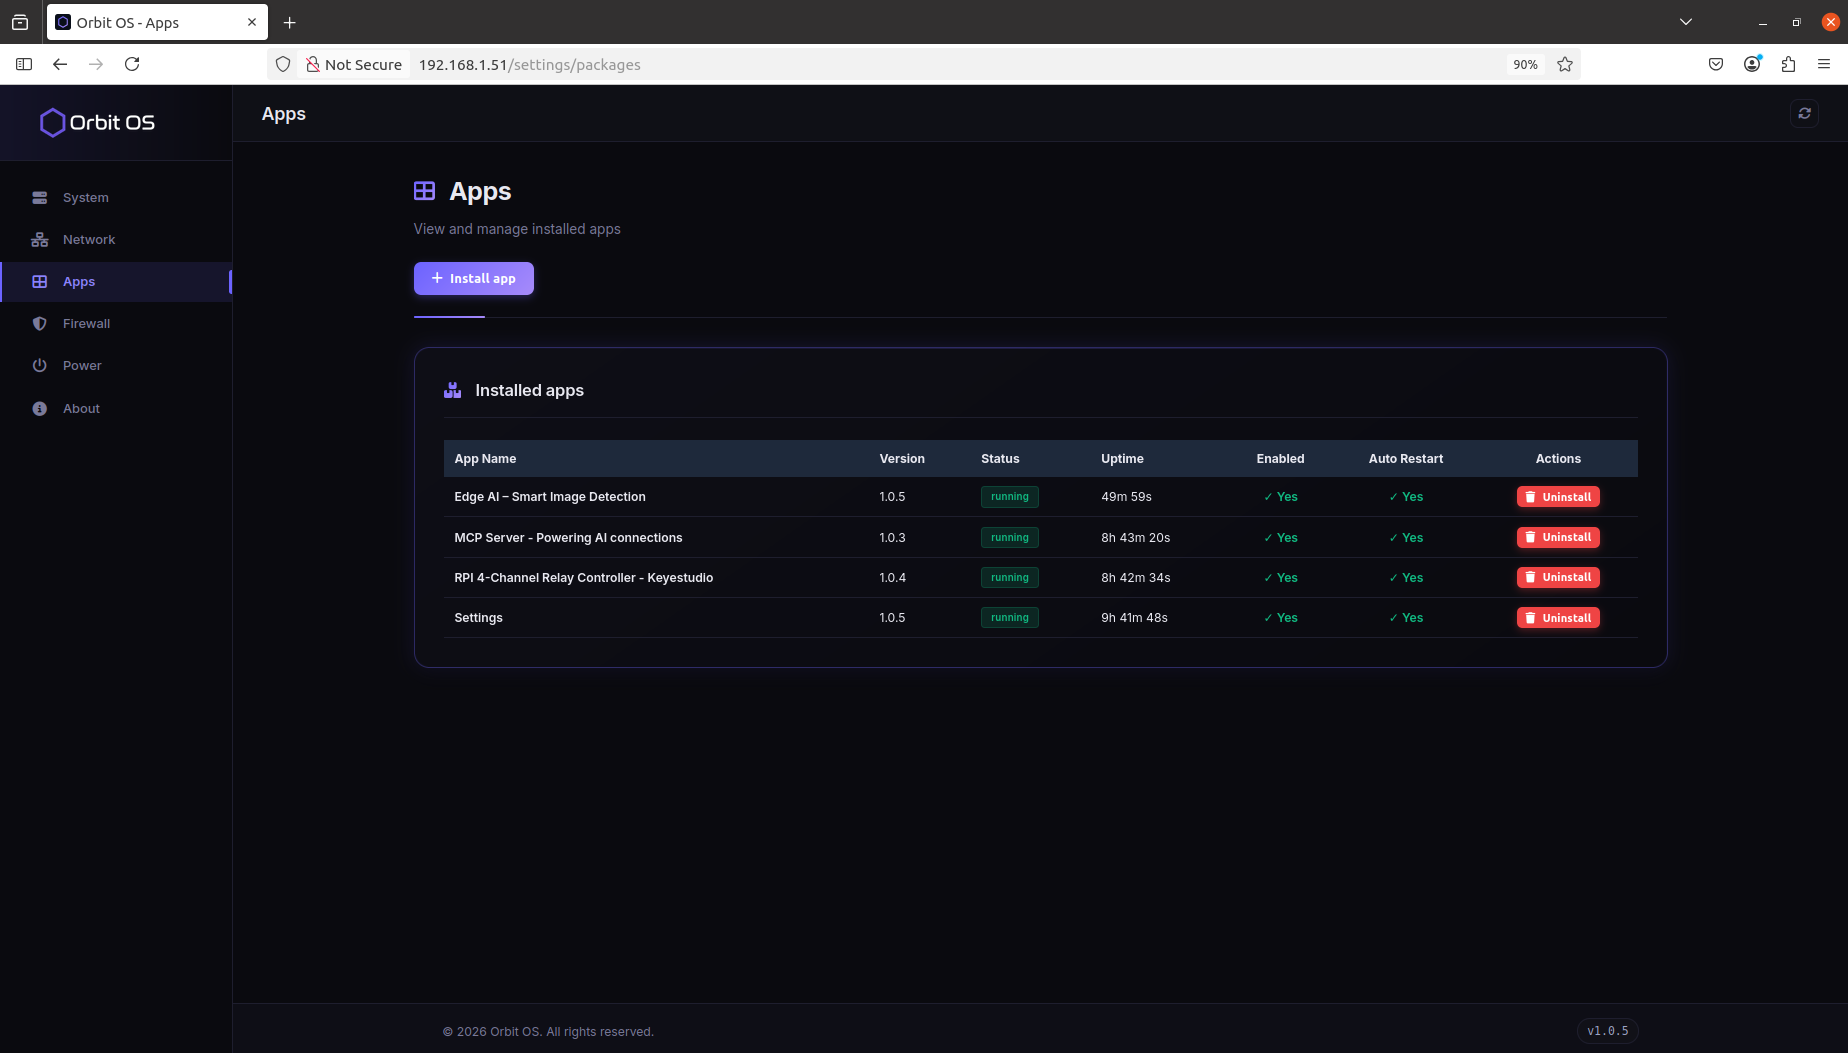
⚙️ Settings — Apps
The Apps section lists all installed .orb apps running on the device. For each app you can see its current status, uptime, and whether auto-restart is enabled. Apps can also be installed locally from a .orb file or uninstalled directly from this view.
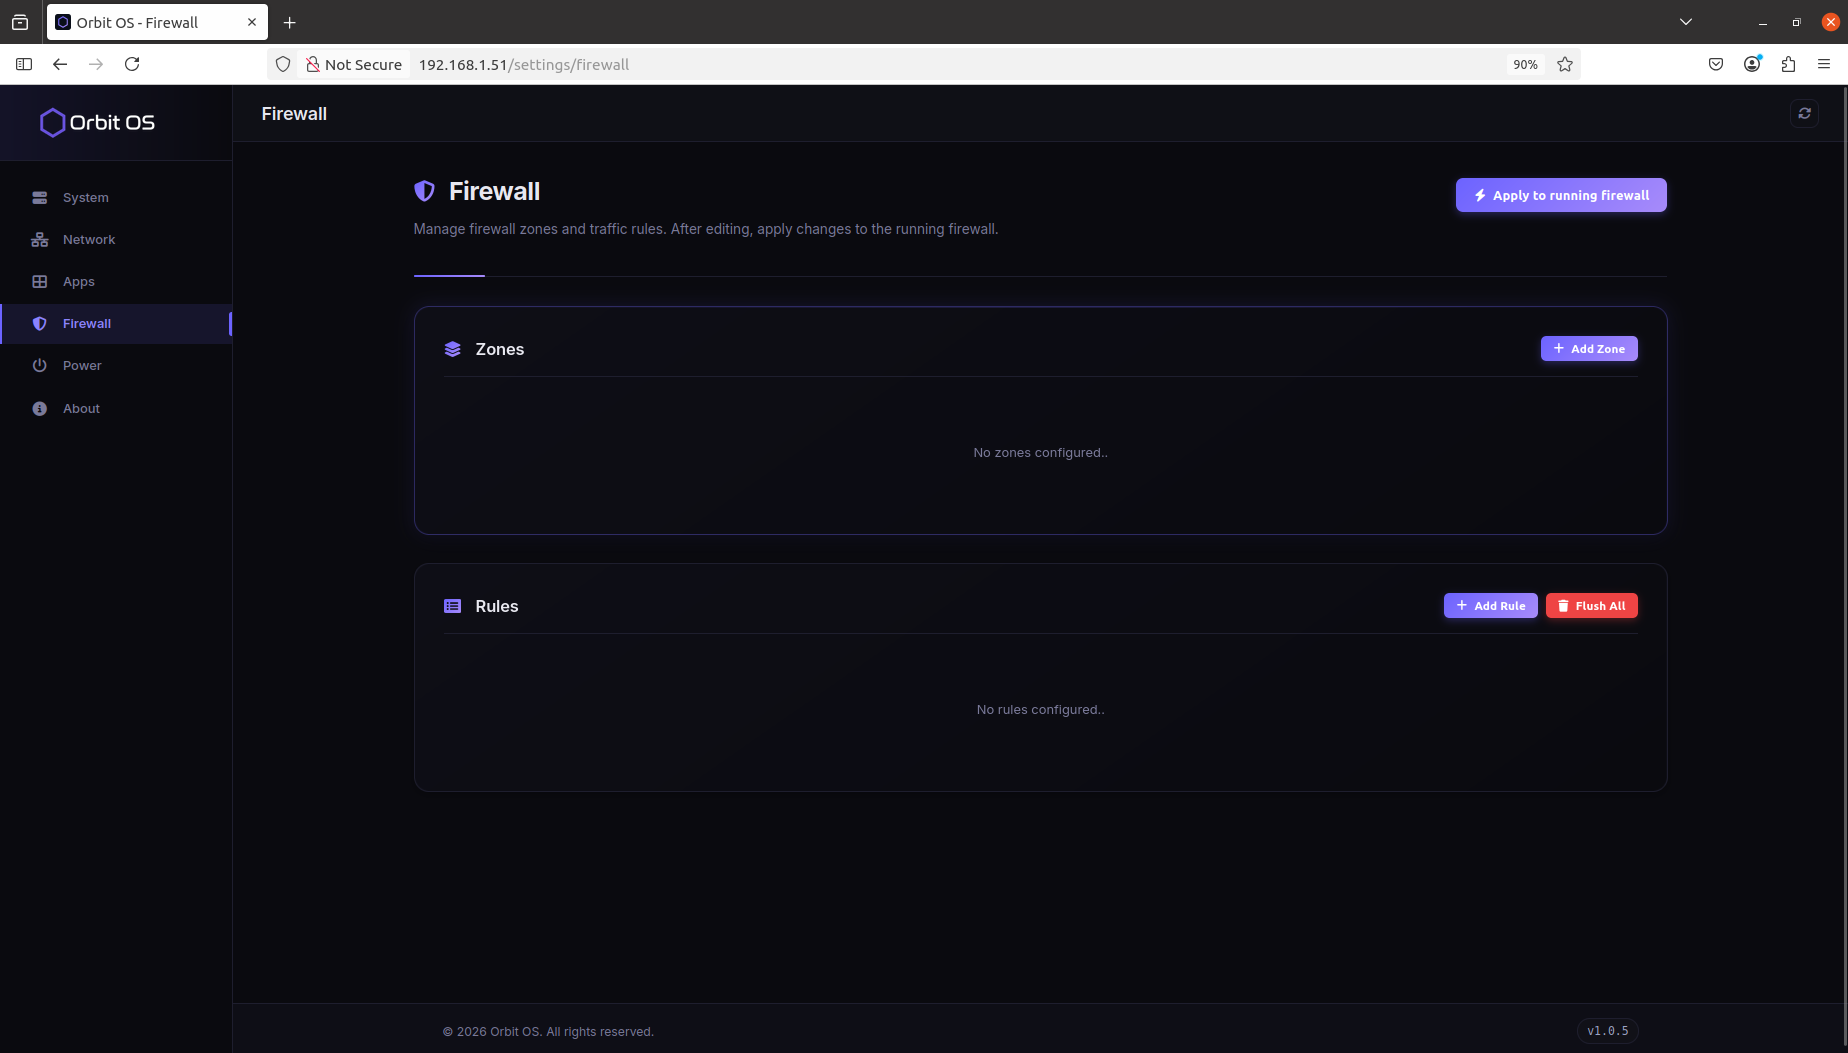
⚙️ Settings — Firewall
The Firewall section lets you define zones and traffic rules to control what network traffic the device accepts, forwards, or drops. Changes are staged and only take effect once you explicitly apply them to the running firewall.
- Zones — group network interfaces into logical trust boundaries (e.g. LAN, WAN). Each zone defines a default policy for traffic originating from that interface.
- Rules — define specific allow or deny conditions on top of zone policies, matching by protocol, port, source, or destination.
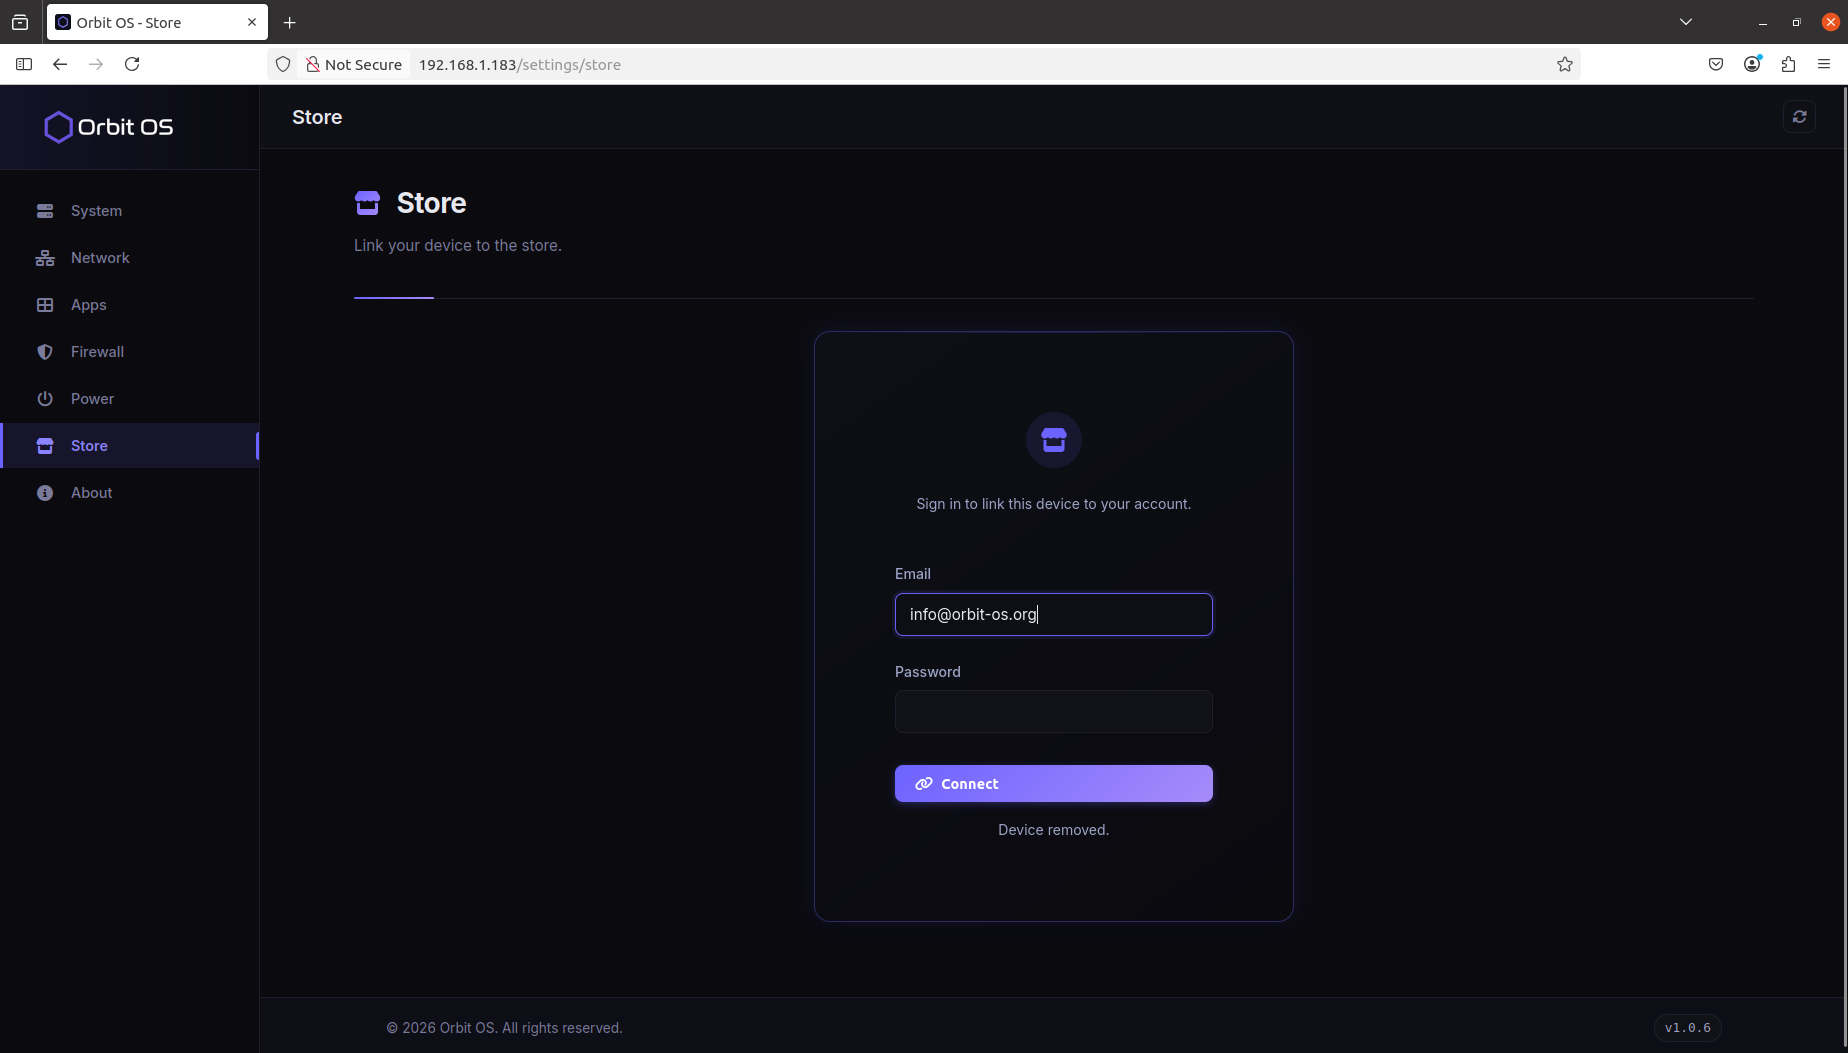
⚙️ Settings — Account
The Account section is where you link the device to your Orbit OS Store account. Enter your Store email and password and press Connect — once registered, the device appears in your fleet and is ready for remote app installs and OTA updates.
See Register Your Device for the full registration flow and screenshots.
⚙️ Settings — Developer
The Developer menu is only visible when Developer Mode is active. It can be enabled under System → Security → Developer Mode.
It has two tabs: Tools and Logs.
Tools
Exposes the SDK connection details needed to connect from a laptop and call device APIs in real time — without packaging or deploying anything.
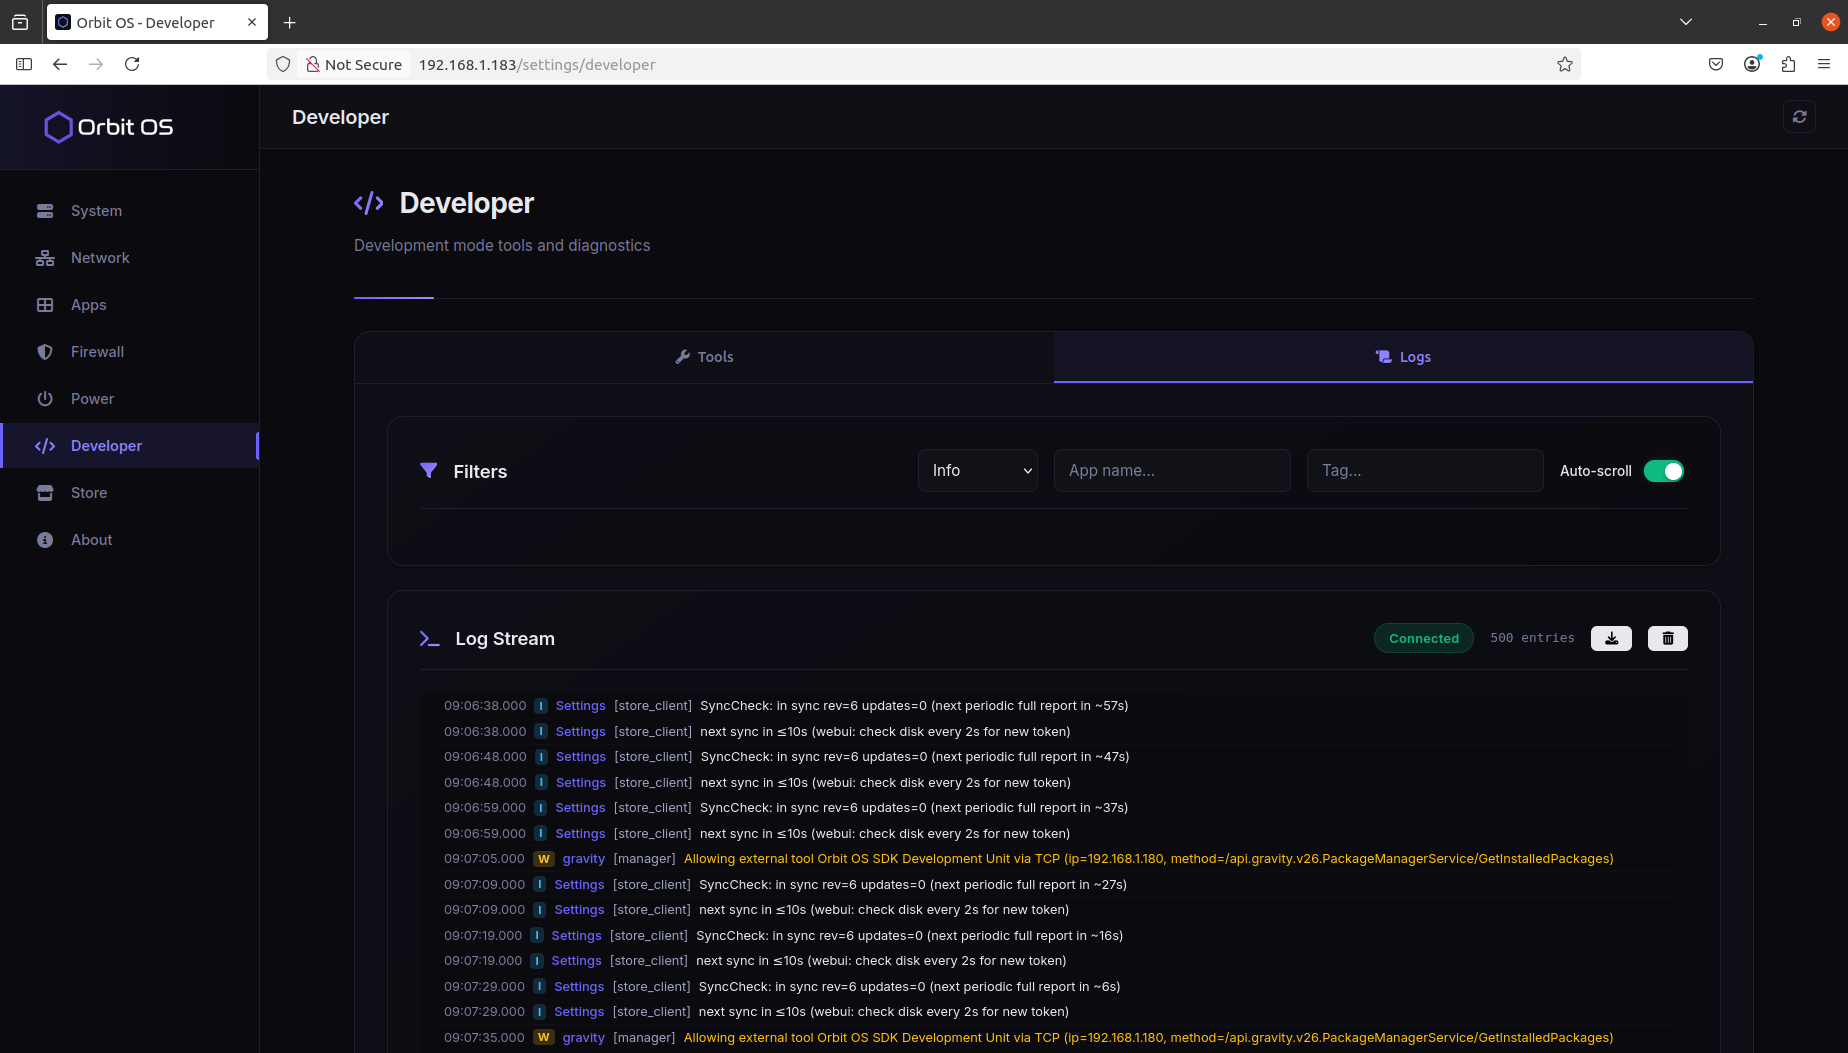
Logs
Streams live logs from all running .orb apps on the device. Useful for monitoring output and debugging in real time without SSH access. The log view supports three filters to narrow down the output:
- Log level — filter by severity (e.g. DEBUG, INFO, WARN, ERROR)
- App name — show logs from a specific app only
- Tag — filter by a specific log tag within the output
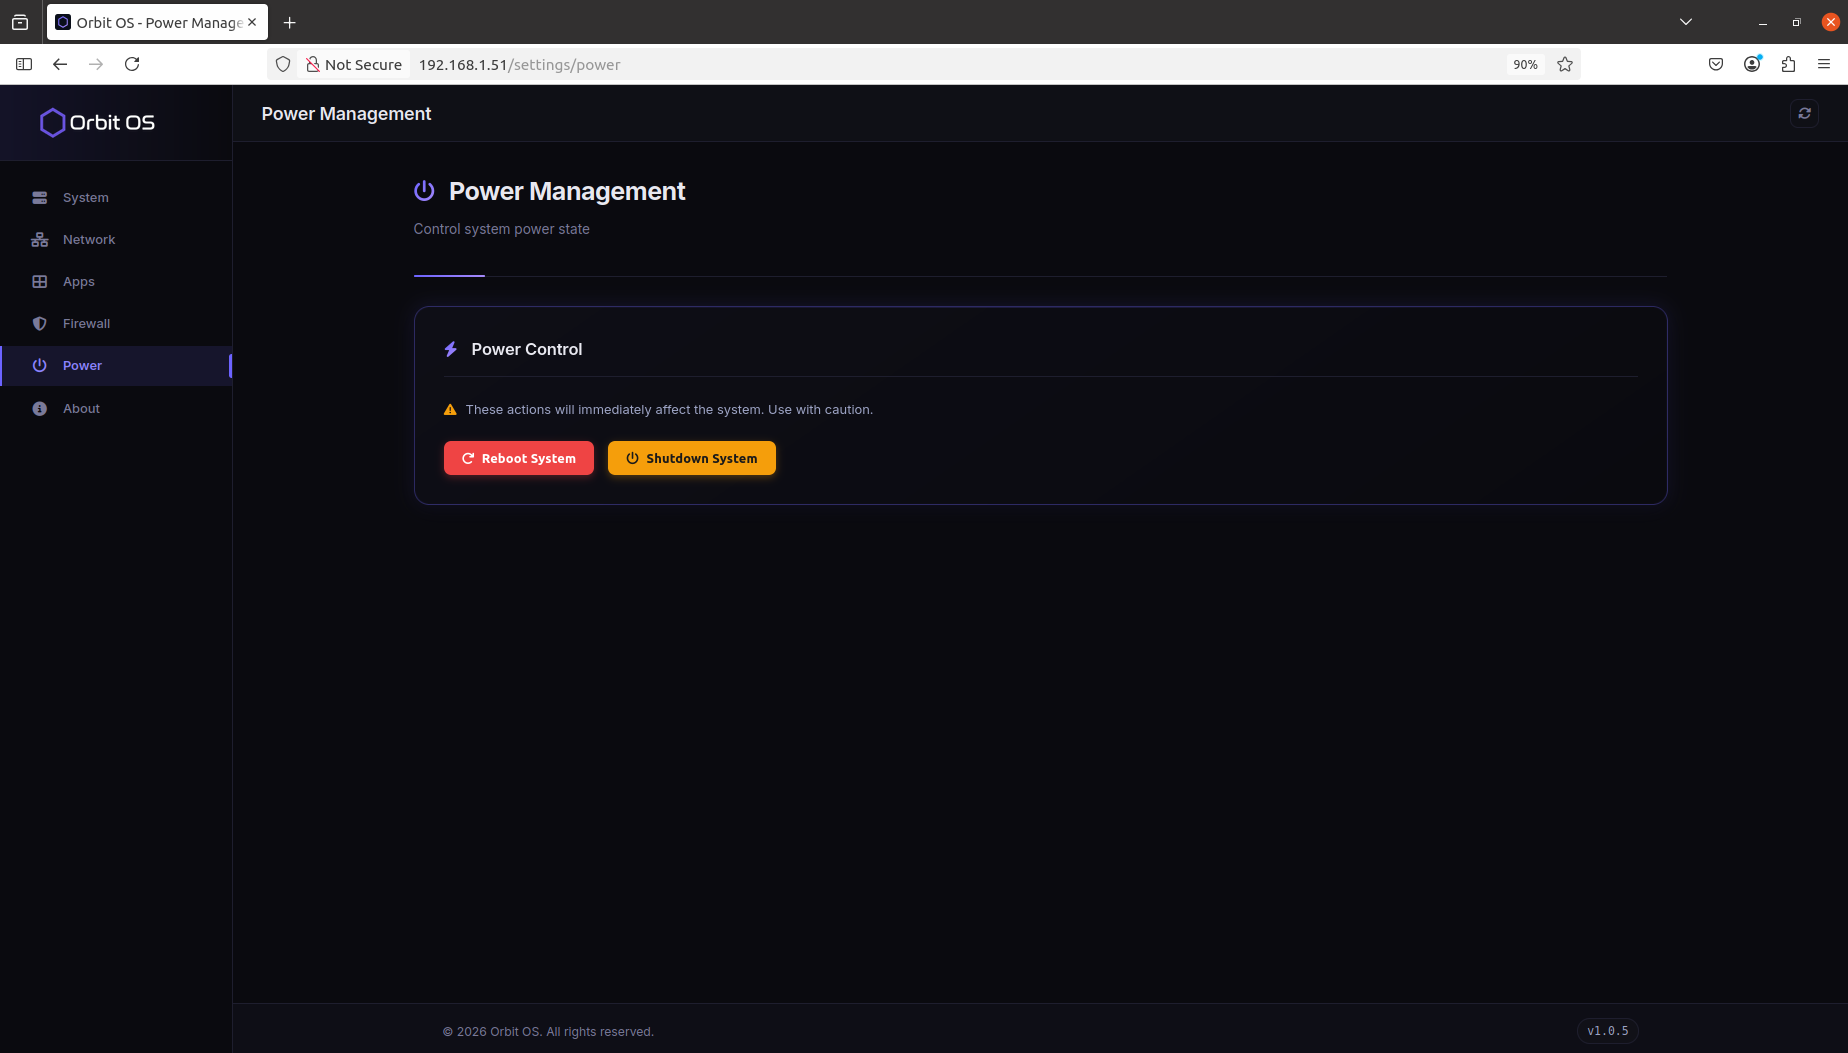
⚙️ Settings — Power
The Power section lets you control the system power state directly from the Launcher. Two actions are available — both take effect immediately.
- Reboot — restarts the device. All running
.orbapps will be relaunched automatically after boot. - Shutdown — powers the device off completely.
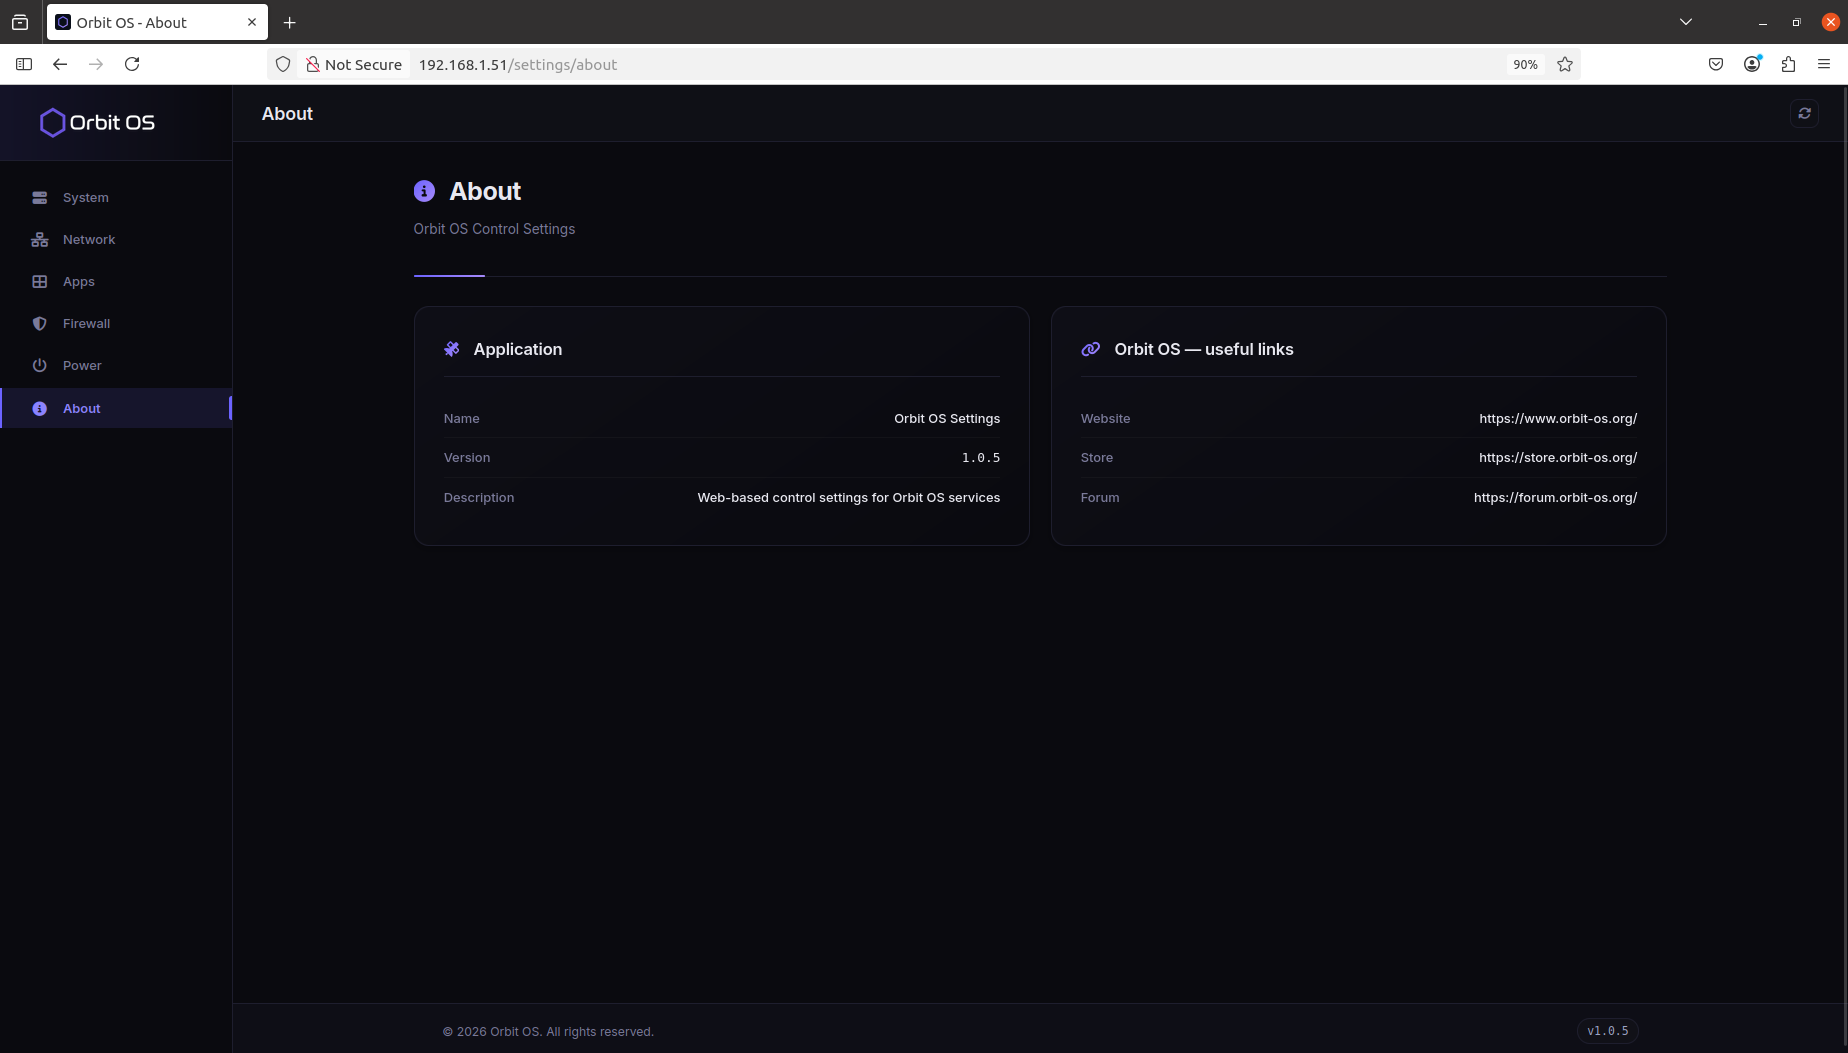
⚙️ Settings — About
The About section shows version and metadata for the Settings app itself, along with quick links to the Orbit OS website, Store, and Forum.
🏪 Create Account
The Orbit OS Store is the marketplace for edge apps — browse, install, and update .orb packages on your devices with one click. No manual transfers, no SSH.
You can browse the Store without an account — explore available apps, read descriptions, and check ratings freely. To install apps or manage devices, you'll need to sign in. Click Sign In in the top-right corner to log in or create a new account.
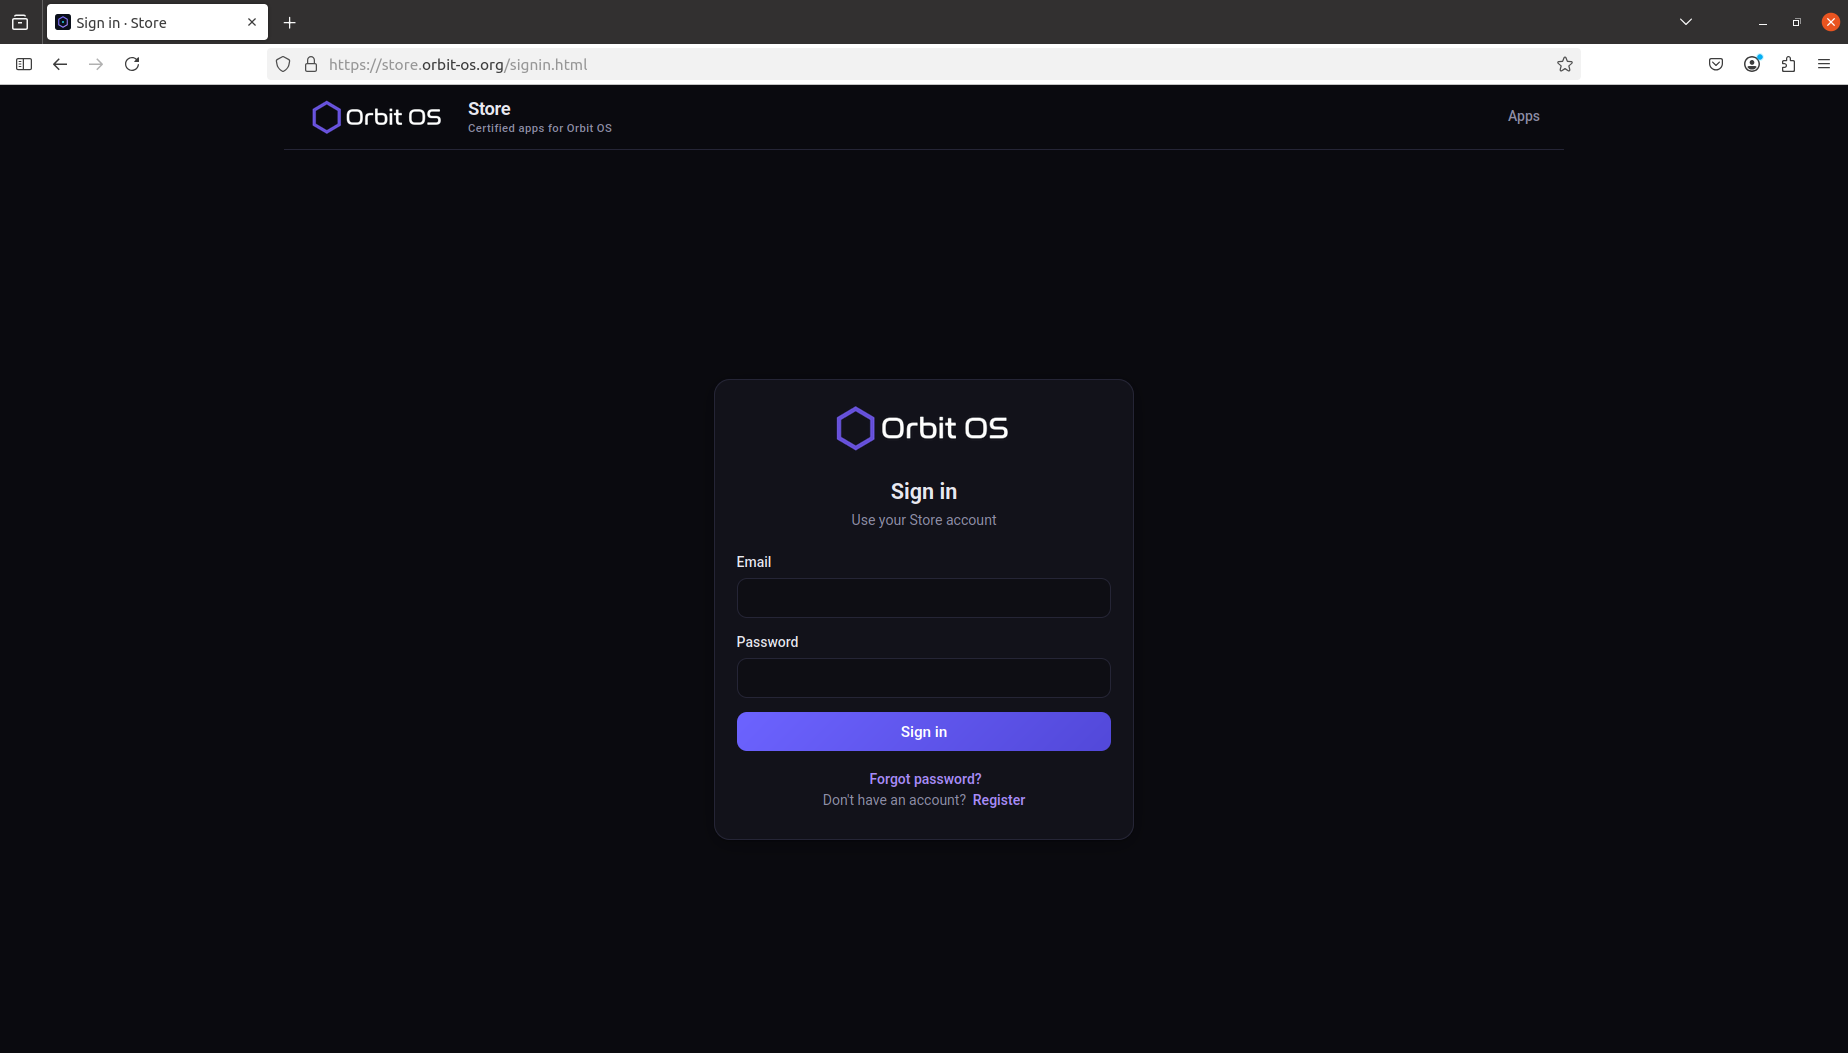
Registration requires only an email address and a password. Once submitted, you will receive a confirmation email — click the link inside to activate your account. After activation, log in and you're ready to go.
- Go to store.orbit-os.org
- Click Sign In → Register and enter your email and password
- Check your inbox and confirm your email address
- Log in — your account is active and ready
🏪 Exploring the Store
The Orbit OS Store works like a mobile app store — browse available .orb apps, read descriptions and reviews, and install directly to your registered devices. No terminal, no file transfers.
The home screen surfaces a For You section with personalised recommendations, followed by curated categories — Edge AI, Networking, Tools, Industrial, and more. Each app card shows its icon, name, and rating at a glance.
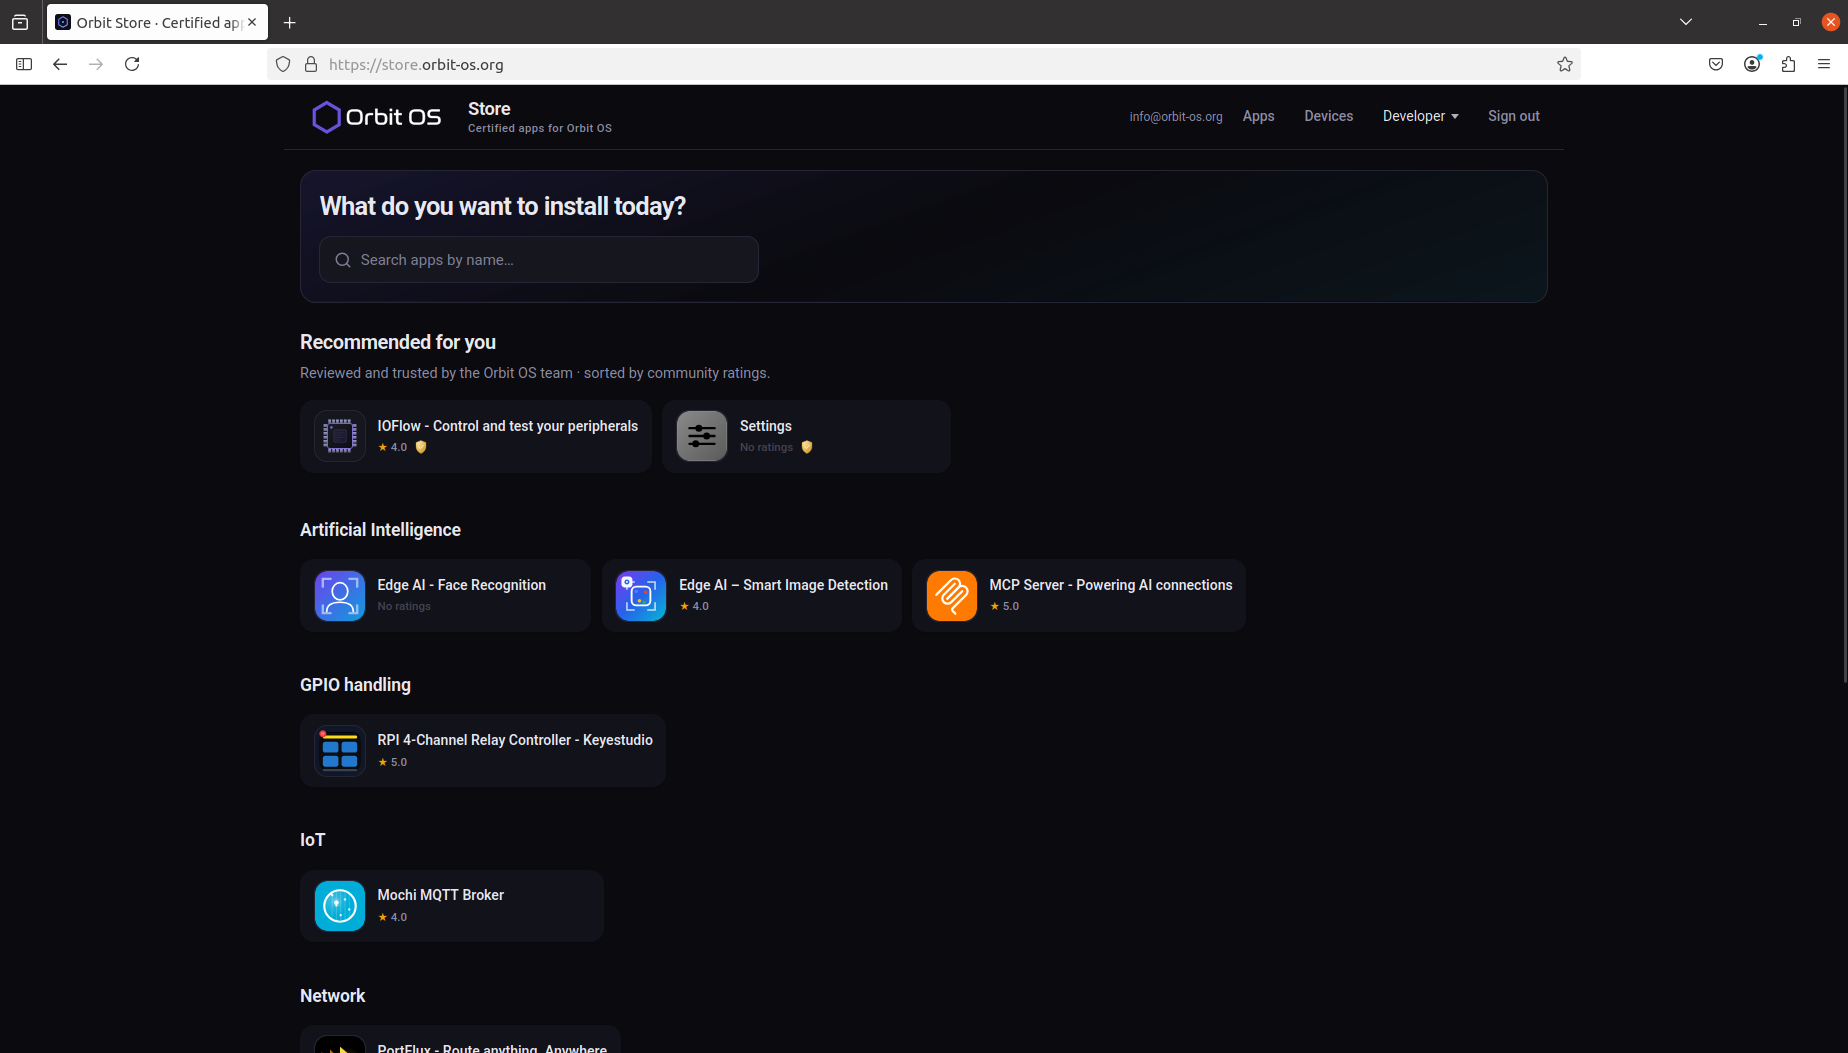
Once signed in, the top-right corner of the Store shows your account menu with four options: Apps, Devices, Developer, and Sign Out.
🏪 Store — Apps
Lists all apps available in the Store. Clicking an app opens its detail page — icon, title, description, ratings, and install count. From there you can install the app directly to any of your registered devices.
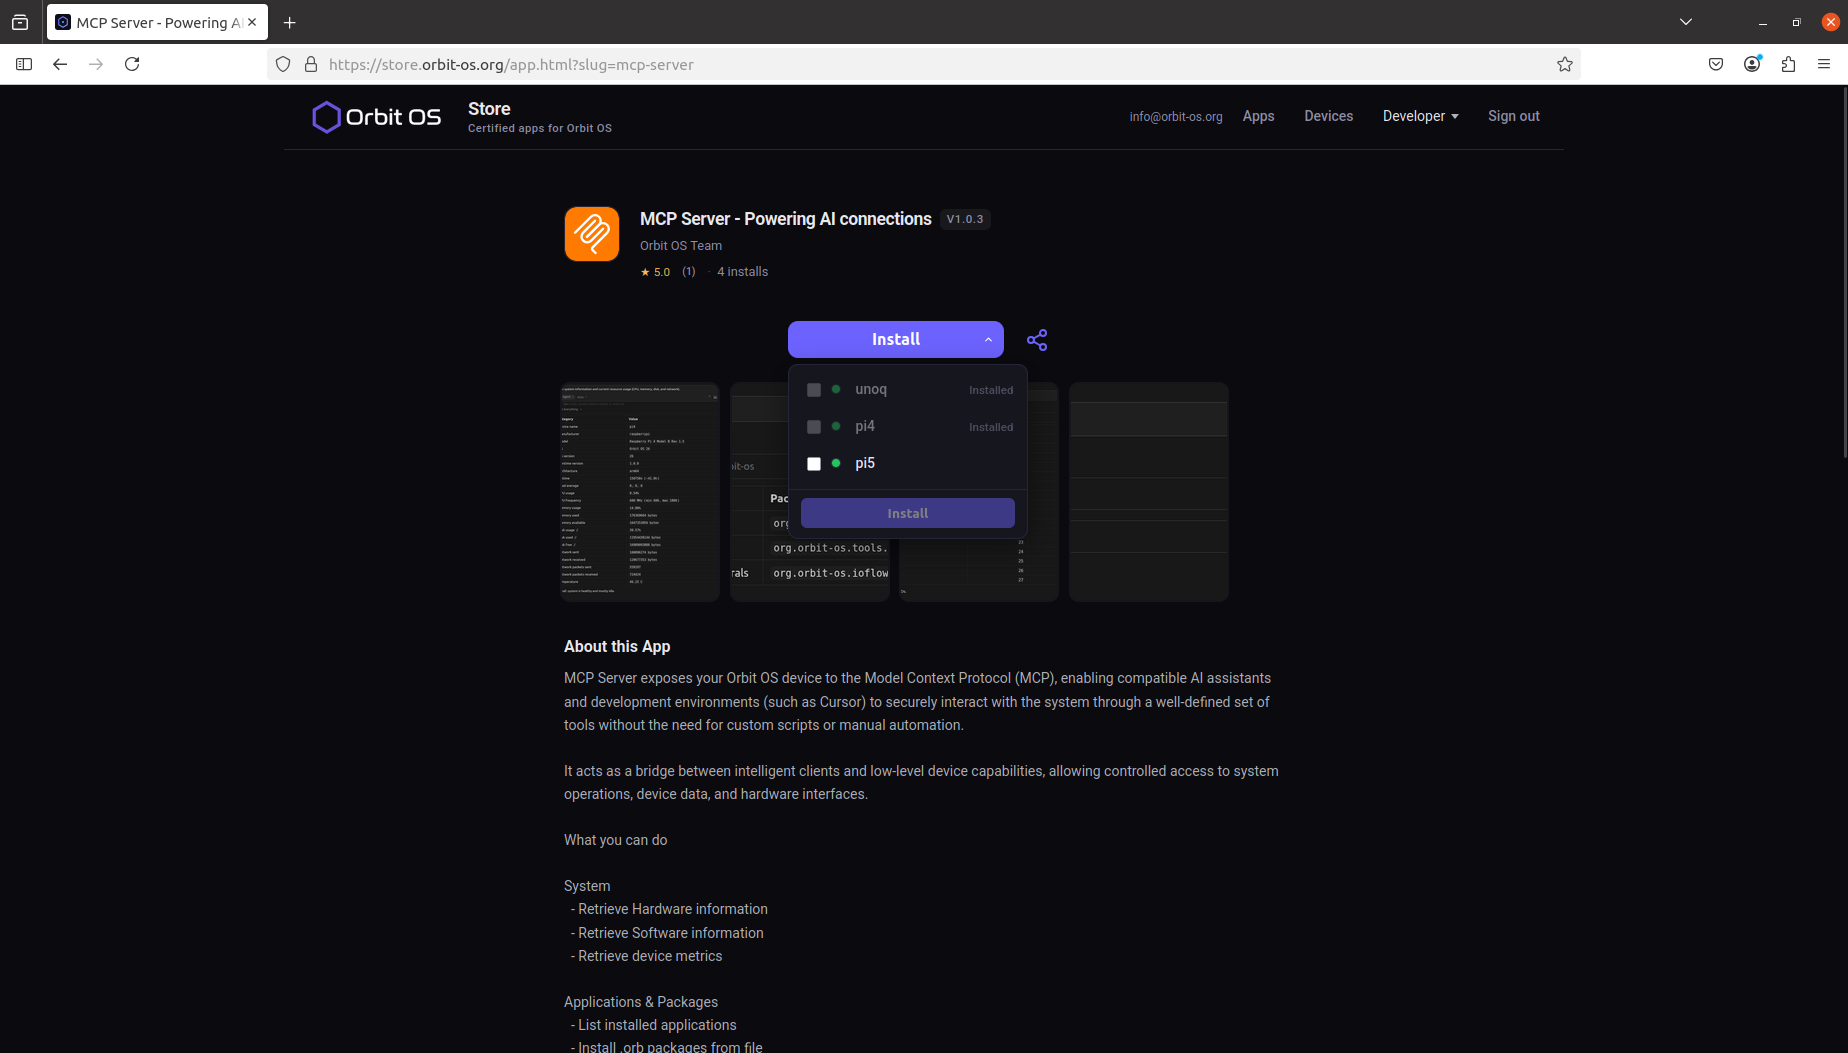
The Install button includes a dropdown listing all devices linked to your account. Select the target device and press Install — the .orb package is delivered and installed remotely without any manual file transfer or SSH access.
As an example, the MCP Server app exposes your Orbit OS device to the Model Context Protocol, allowing AI assistants and tools like Cursor to interact with the device through a defined set of capabilities:
- System — retrieve hardware info, software info, and device metrics
- Applications & Packages — list installed apps, install
.orbpackages, uninstall by package ID - Power Management — reboot or shut down the device
🏪 Store — Devices
Shows all Orbit OS devices linked to your account. Each device card displays a green indicator when the device is online and reachable. From here you can search the list and manage each device individually.
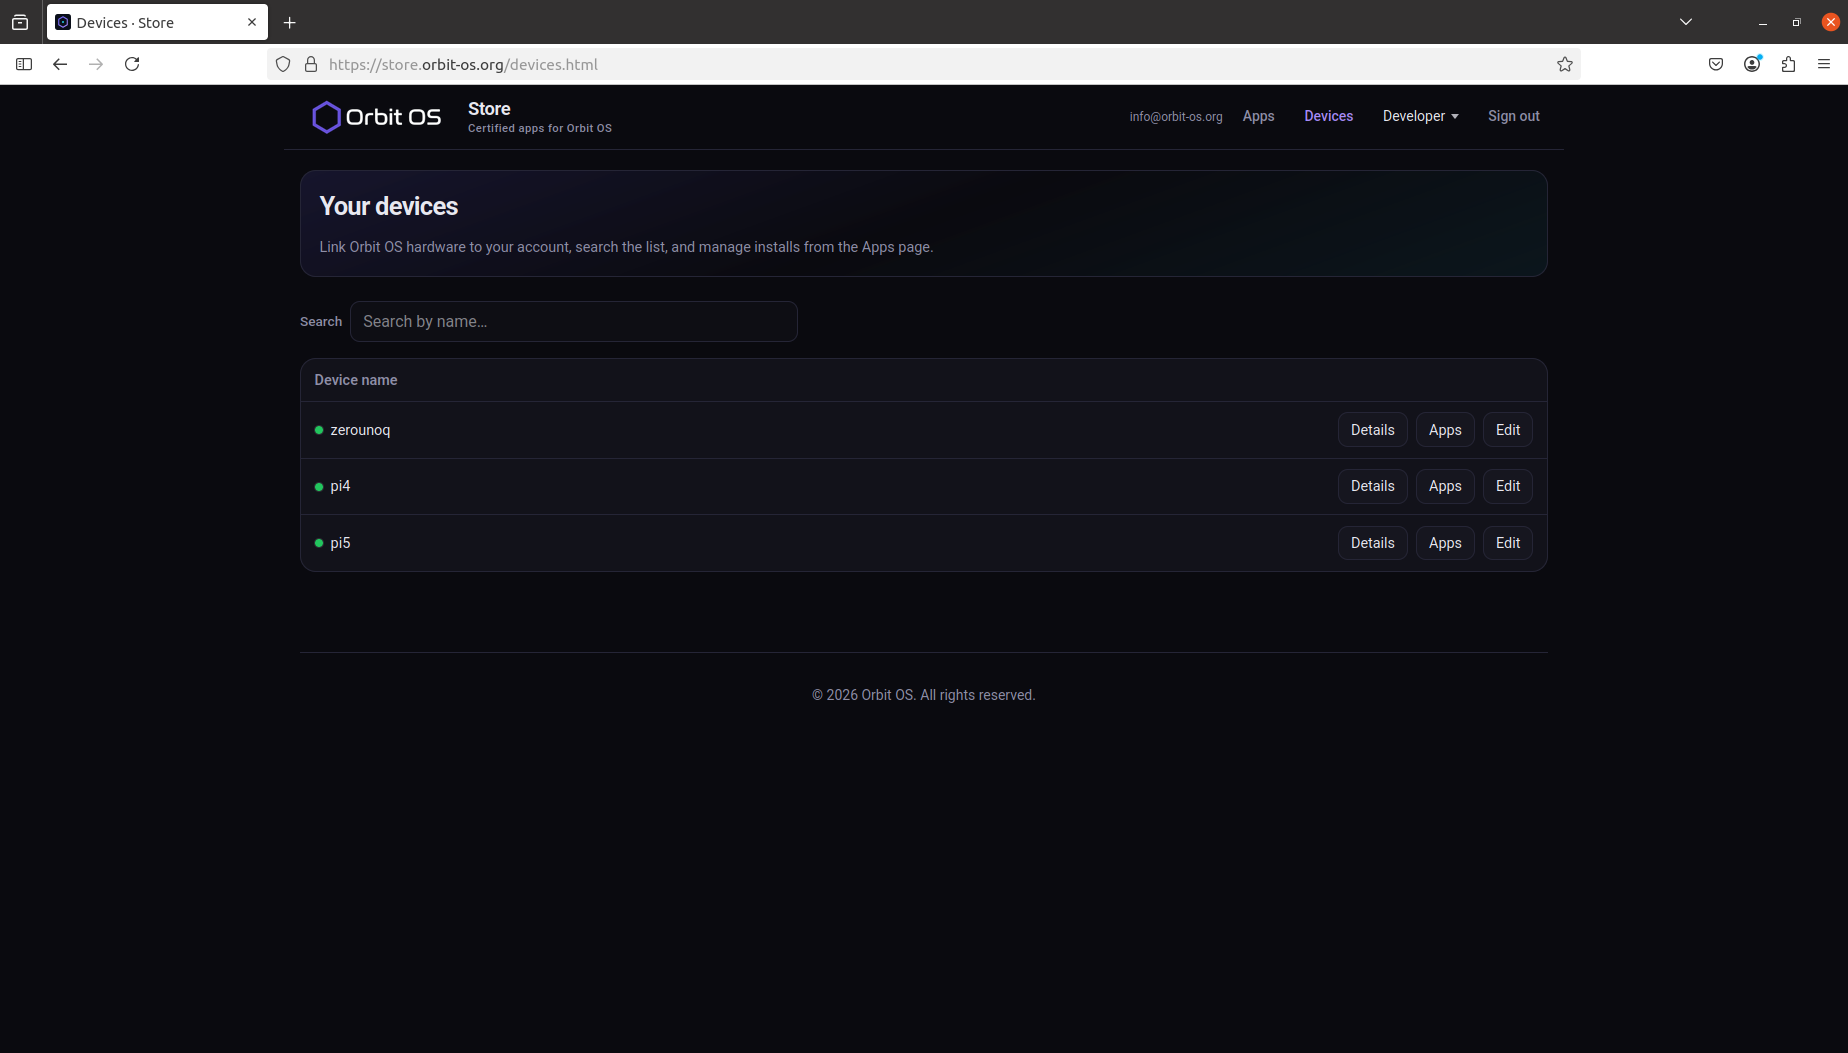
In this example, three devices are registered and online: unoq (Arduino UNO Q), pi4 (Raspberry Pi 4) and pi5 (Raspberry Pi 5).
Each device in the list has three actions: Details, Apps, and Edit.
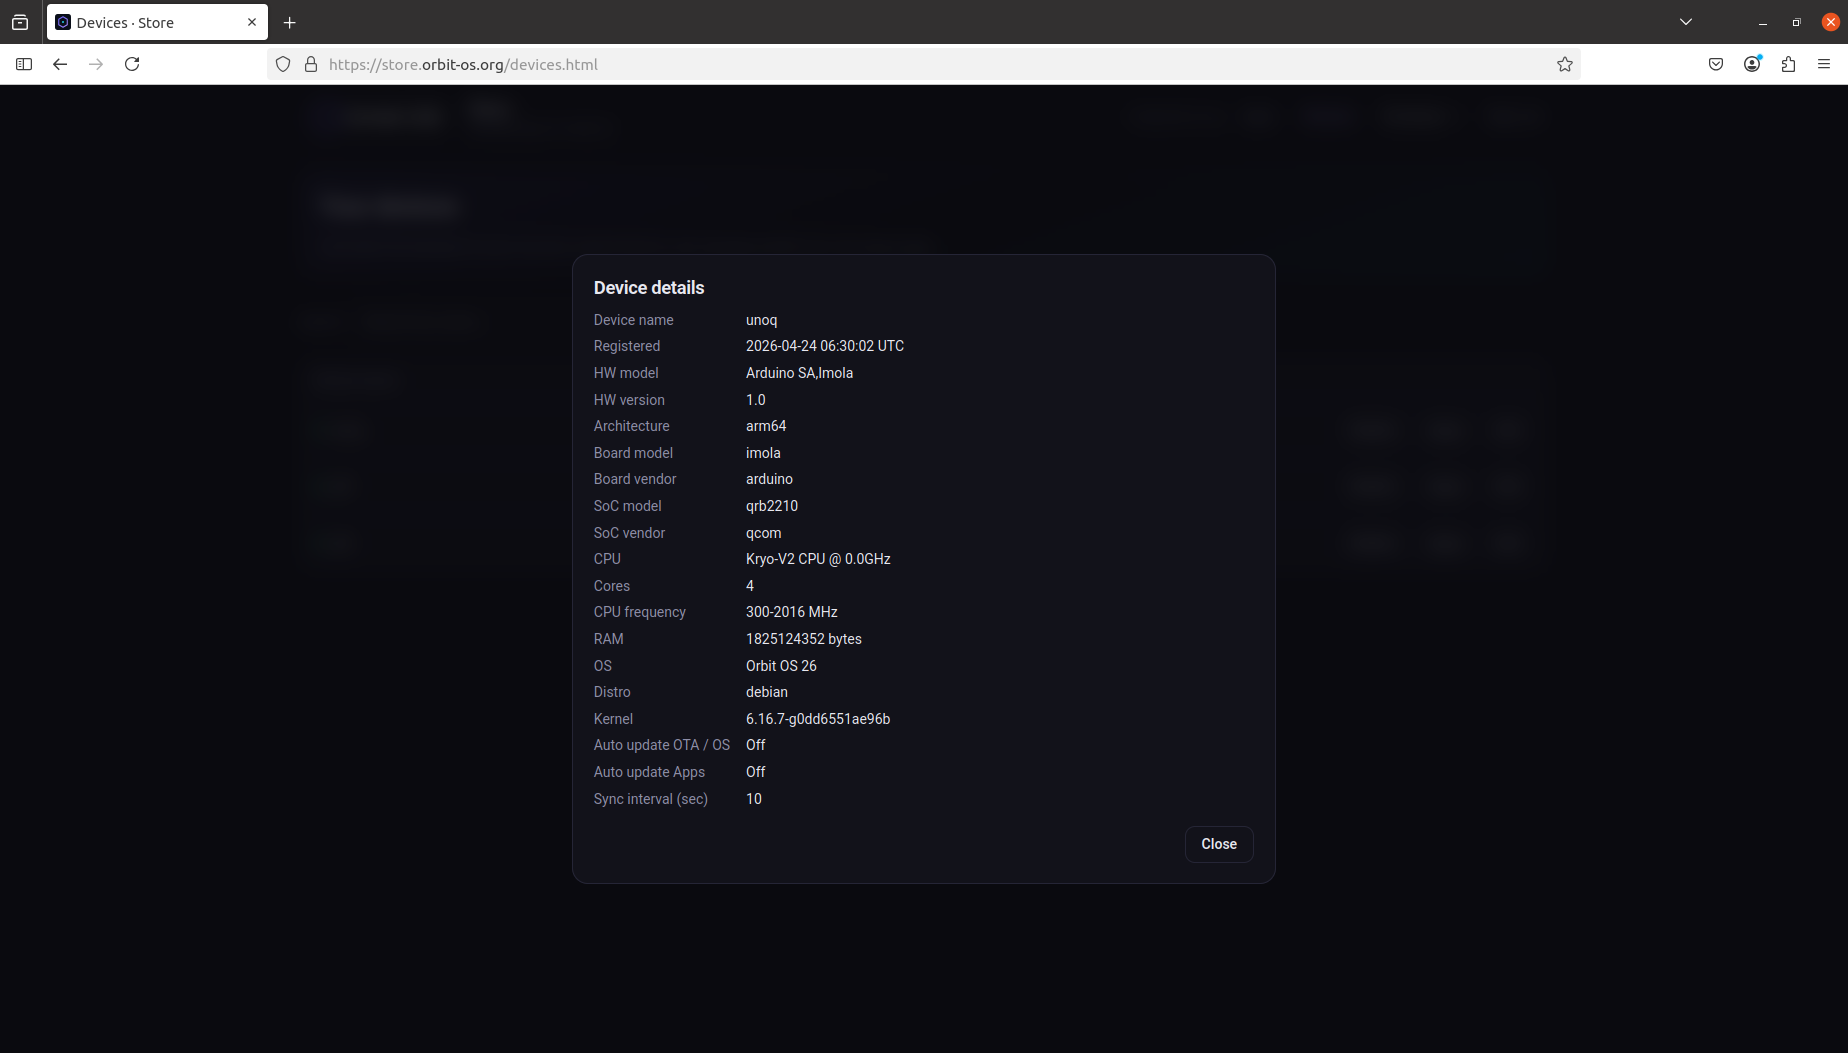
Device Details
Full hardware and software snapshot of the device.
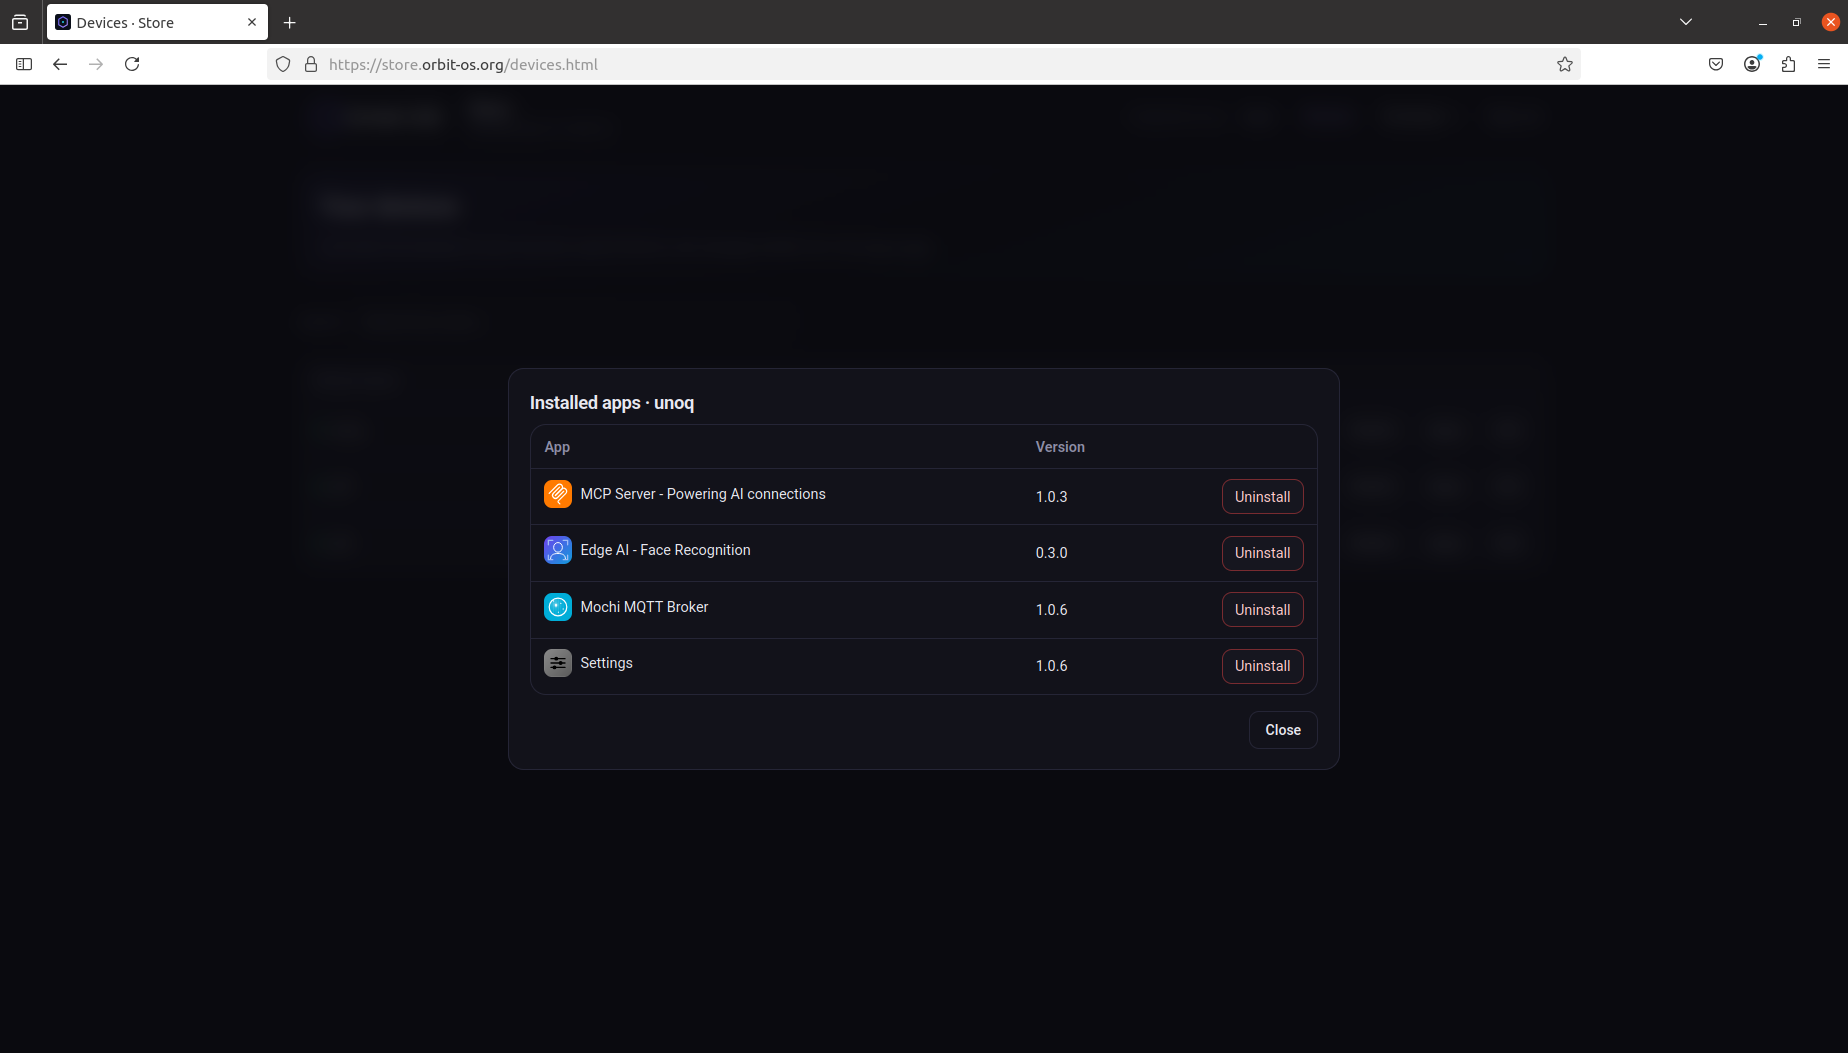
Device Apps
Lists the .orb apps currently installed on that device, with their version numbers. Each entry has an Uninstall action — removing an app from here uninstalls it from the device remotely.
Device Edit
Allows you to configure per-device behaviour directly from the Store:
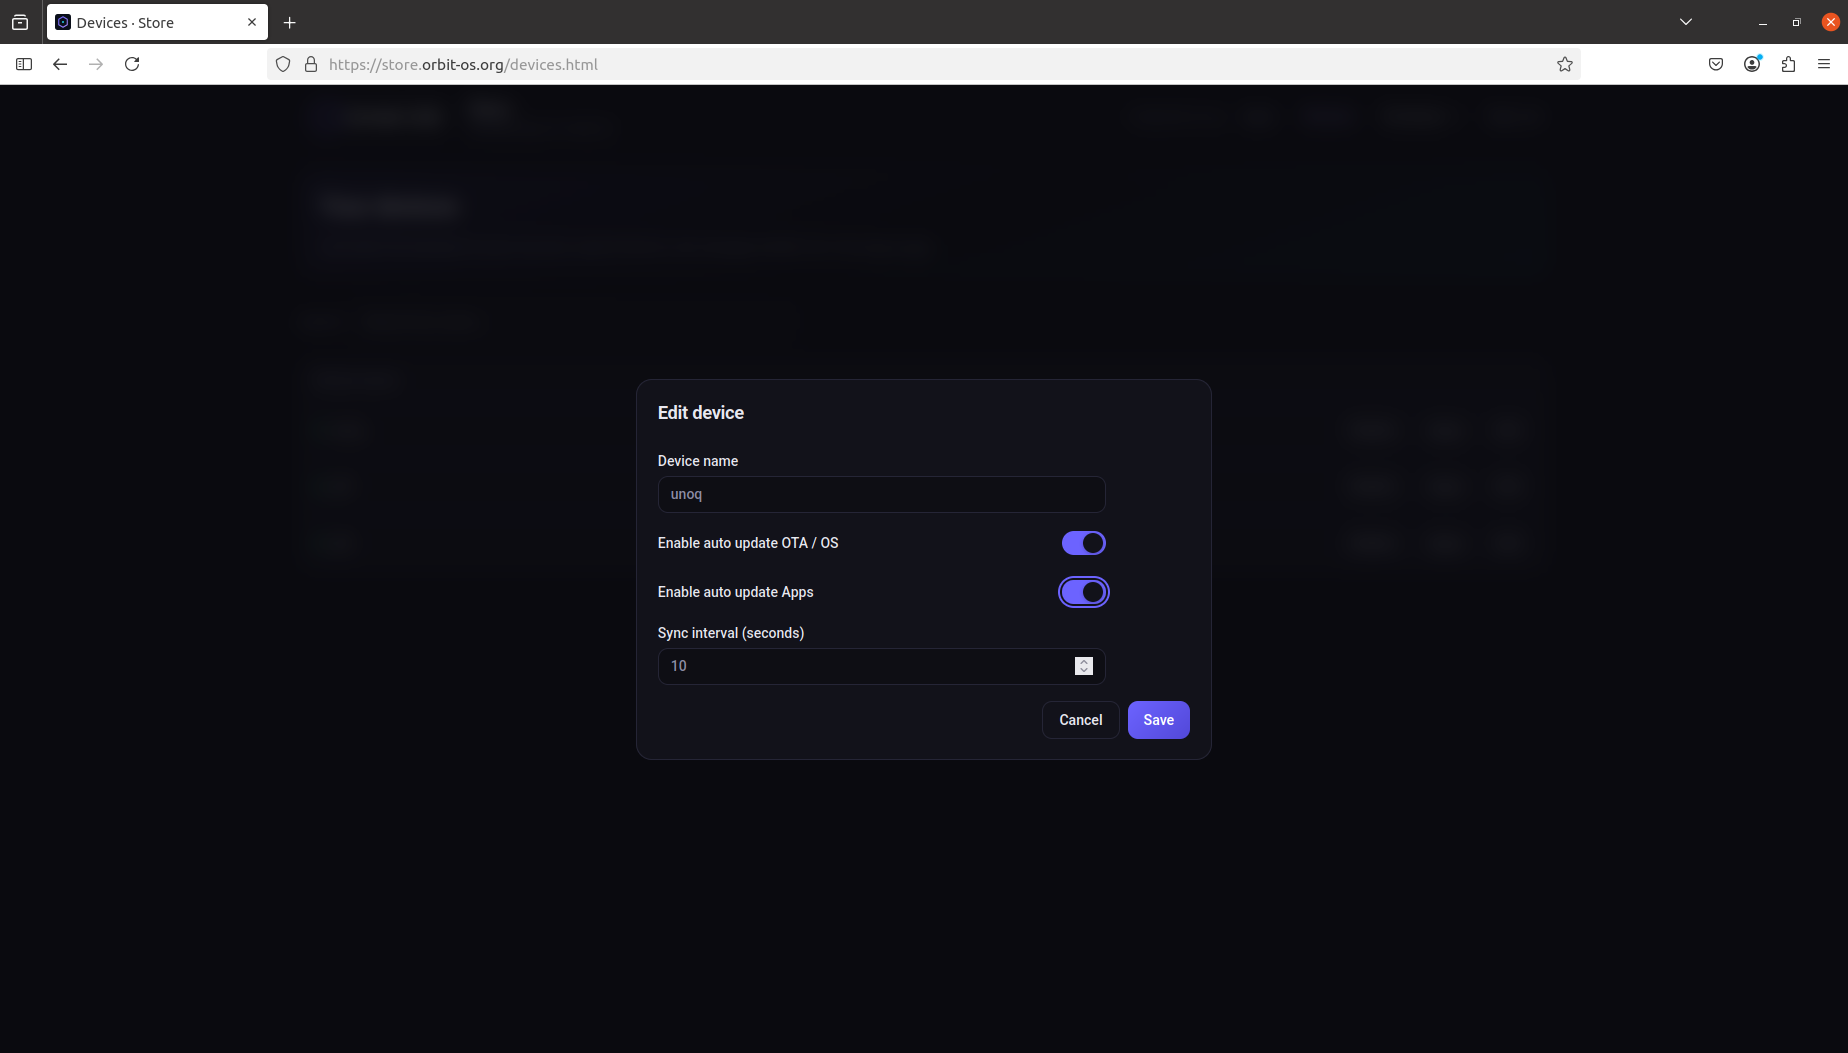
- Device name — rename the device in your fleet
- Enable auto update OTA / OS — automatically apply runtime updates when available
- Enable auto update Apps — automatically update installed
.orbapps - Sync interval (seconds) — how often the device checks in with the Store
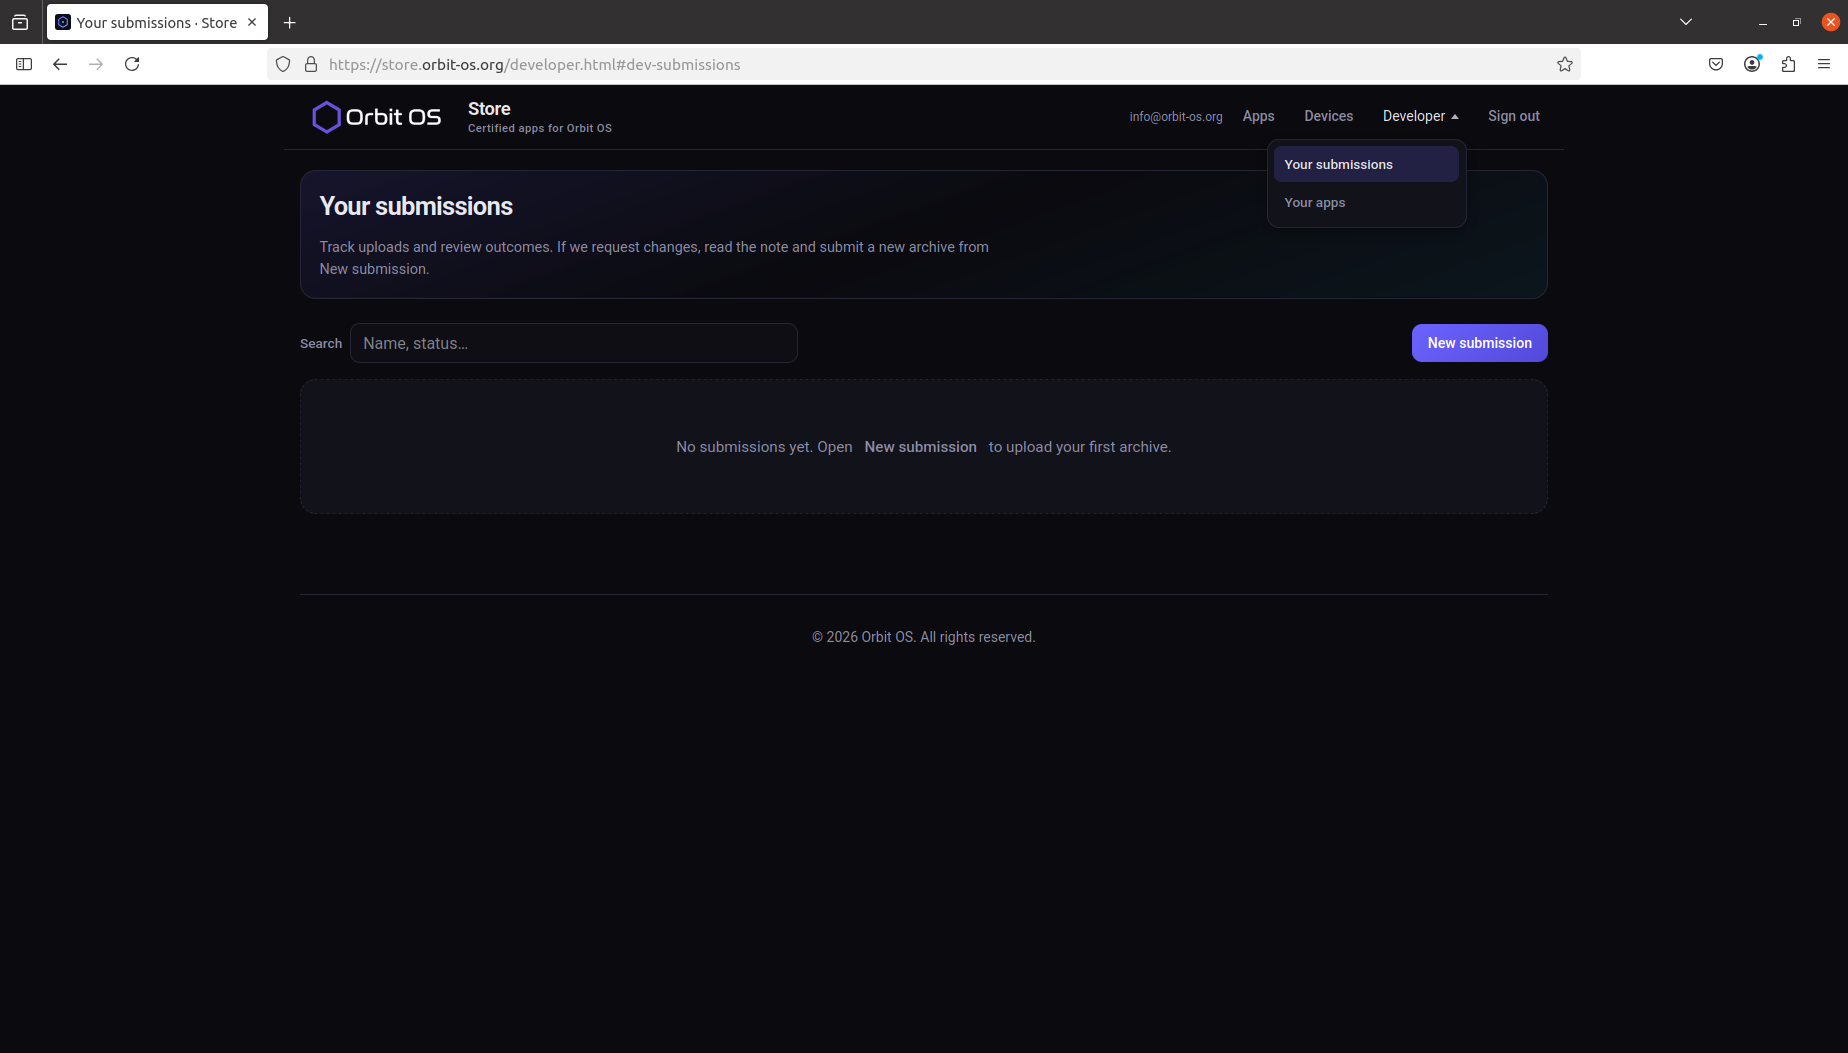
🏪 Store — Developer
The Developer area is for publishers who want to distribute apps through the Orbit OS Store. It provides two sections: Your Submissions and Your Apps.
- Your Submissions — submit a new
.orbapp for Store approval. Each submission goes through a review process before being published and made available to all users. - Your Apps — view and manage the apps you currently have published on the Store, including version history and listing details.
📡 Register Your Device
Registration links the device to your Store account — enabling remote app installs, OTA updates, and fleet management. The process is done directly on the device, not from the Store website.
- Open the Launcher at
http://<device-ip>and go to Settings - Navigate to Account
- Enter the email and password of your Store account and press Connect
Once registration succeeds, the page updates to confirm the device is linked — showing a green checkmark, the Device linked status, and the associated Store account email. A button to unlink the account is also available from this screen.
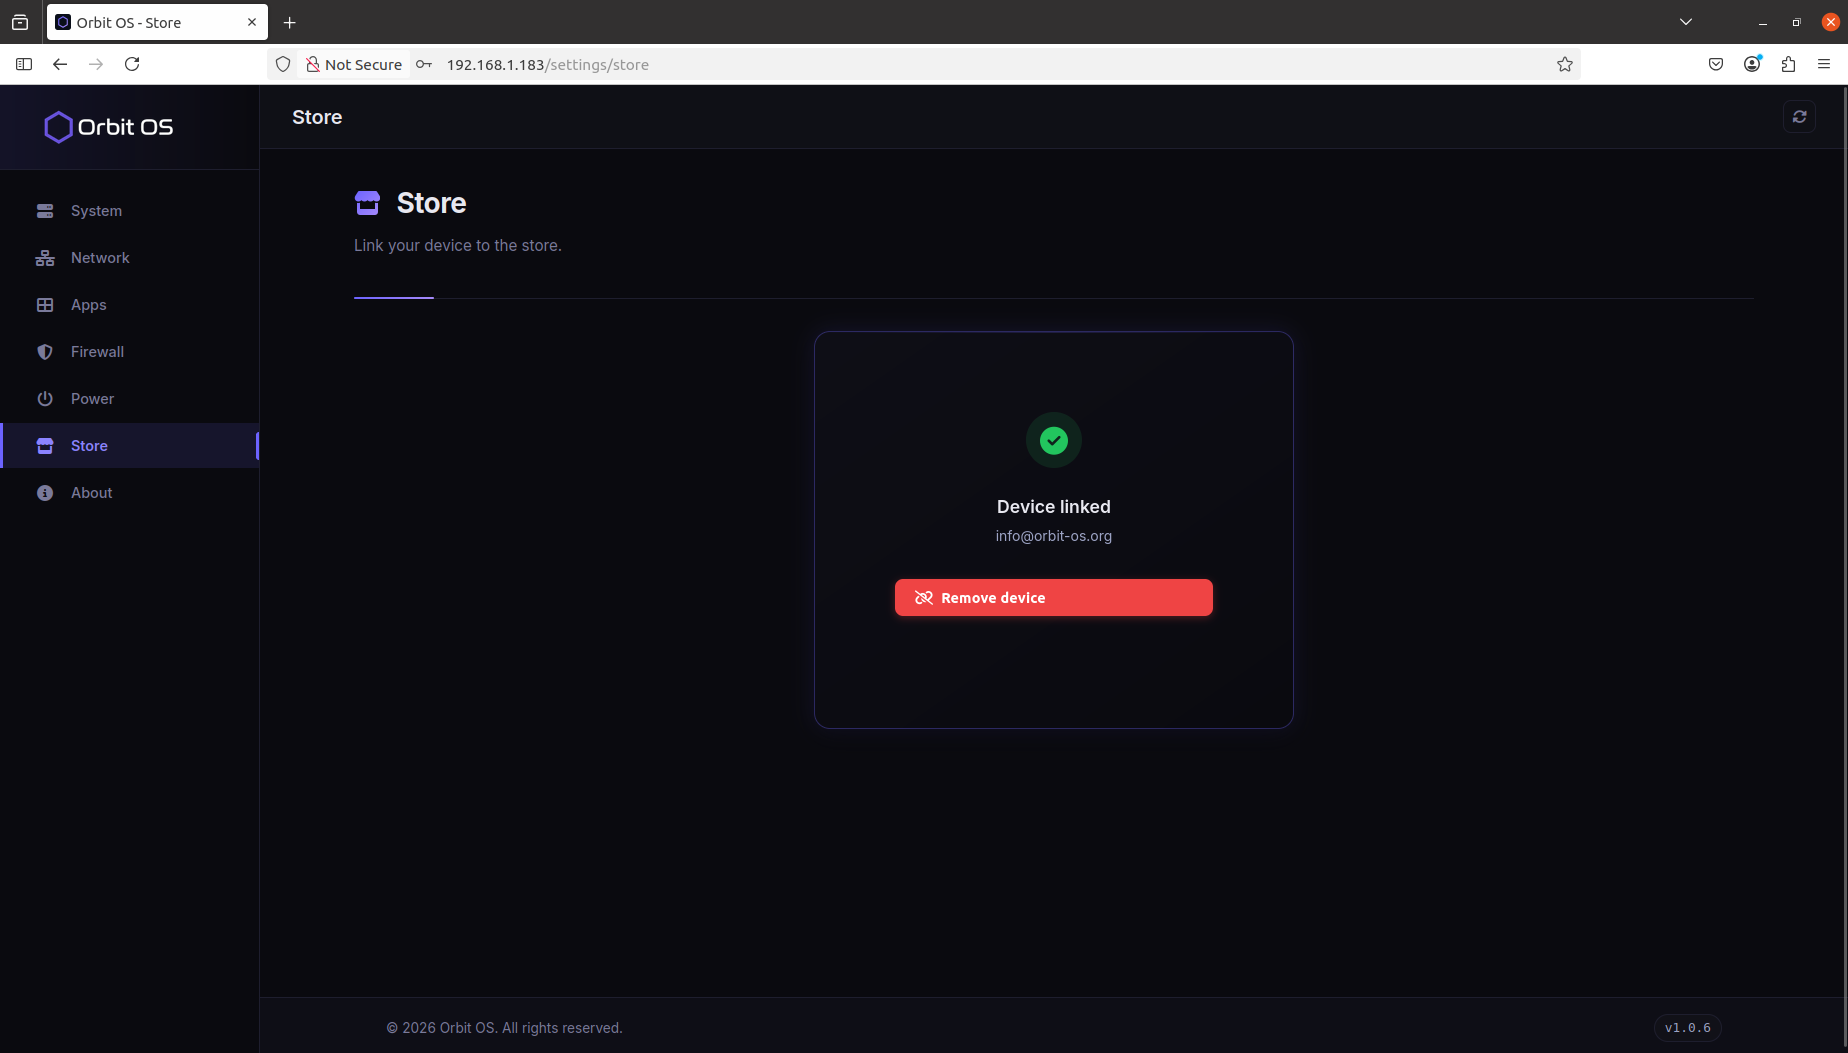
The device requires an active internet connection to complete registration.
Once linked, go to store.orbit-os.org → Devices in your account — the new device will appear in your fleet with its status showing as online. From this point, you can install and uninstall apps remotely from the Store. Automatic app updates and OTA updates are delivered if the respective auto-update options are enabled in the device settings.
🧪 Enable Developer Mode
Developer Mode allows your laptop to connect directly to the device and call its APIs in real time — without packaging or deploying anything.
- Open the Launcher at
http://<device-ip> - Go to Settings → System → Security
- Toggle Developer Mode on
- Read and confirm the security notice
Orbit Studio
Orbit Studio is a VS Code extension that covers the full development lifecycle — from creating a new project to deploying it on a real device. Everything you need to build for Orbit OS is available directly inside the editor.
Install the extension
Orbit Studio is pending approval on the VS Code Marketplace. In the meantime, install it manually from the .vsix file.
- Download orbit-studio.vsix
- Open VS Code or Cursor
- Press
Ctrl+Shift+P(Windows/Linux) orCmd+Shift+P(macOS) to open the Command Palette - Type
Install from VSIXand run Extensions: Install from VSIX... - Select the downloaded
.vsixfile and reload the window if prompted
Extensions installed from a .vsix do not update automatically. To update, repeat the same process with the newer .vsix — it replaces the previous version in place.
Once installed, open the Orbit Studio panel from the VS Code Activity Bar. The home screen gives you access to all extension features — project creation, device connection, and deployment.

What Orbit Studio does
- Language selection — choose the programming language for your project from all supported SDKs: Go, Java, Python, or C++
- SDK version — select the target SDK version at project creation
- Project creation — scaffold a new Orbit OS project with the correct structure and manifest in one step
- Run locally — run your code directly from VS Code against a real device over the network, without packaging or deploying anything
- Build .orb — generate a signed
.orbpackage when your app is ready for deployment - Deploy to device — push the
.orbpackage directly to a connected device from inside the editor
Orbit Studio — Create a Project
In the Orbit Studio sidebar, select Create Project. Fill in the fields below and click Create project — the extension scaffolds the full project structure for you.
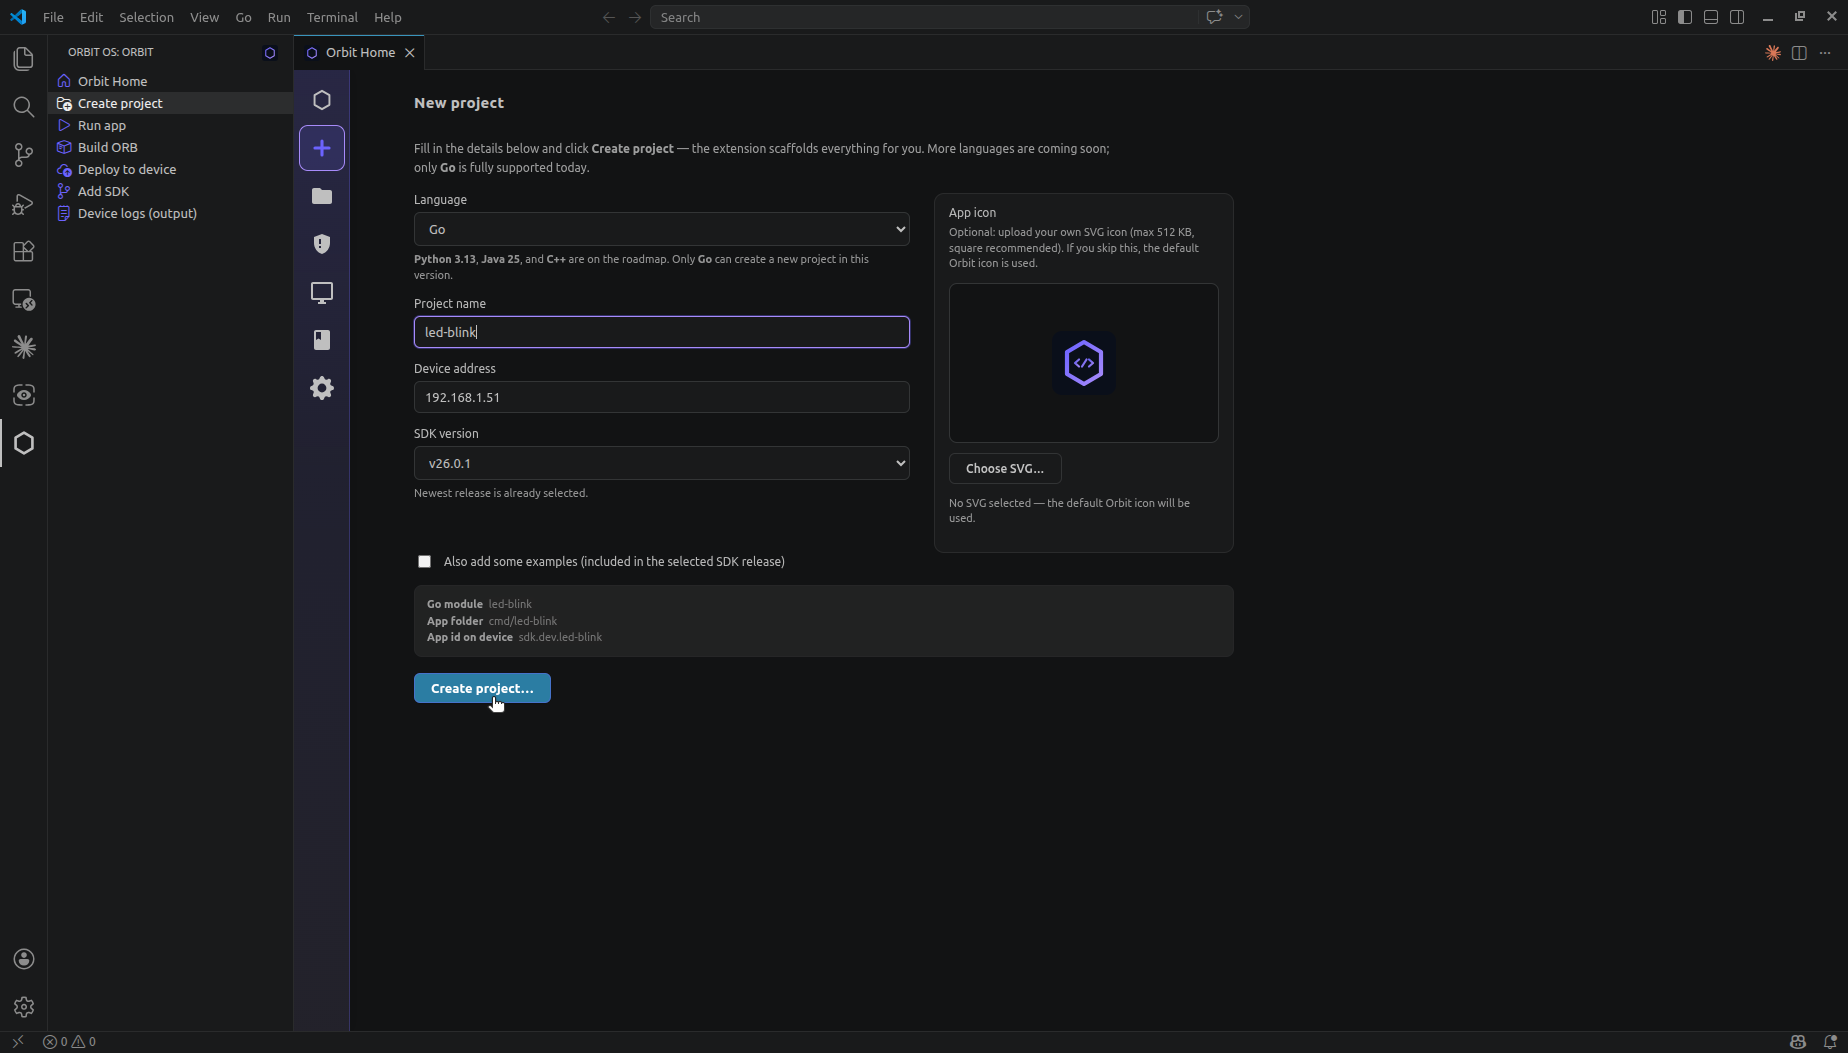
Language
Select one of the available SDK programming languages for your project.
Project name
The name of your project — used to generate the Go module path, the app folder name, and the app ID. Type a name to preview all three before creating.
Device address
The IP address of your Orbit OS device on the local network (e.g. 192.168.1.51). The extension connects to this device when you run the project locally.
SDK version
The target SDK version for this project. The newest release is selected by default.
App icon
Optionally upload your own SVG icon (max 512 KB, square recommended). If you skip this, the default Orbit icon is used. A preview is shown before you confirm.
Examples
Optionally include example code from the selected SDK release to help you get started.
Once all fields are filled in, click Create project… — Orbit Studio generates the project structure and opens it in VS Code ready to run.
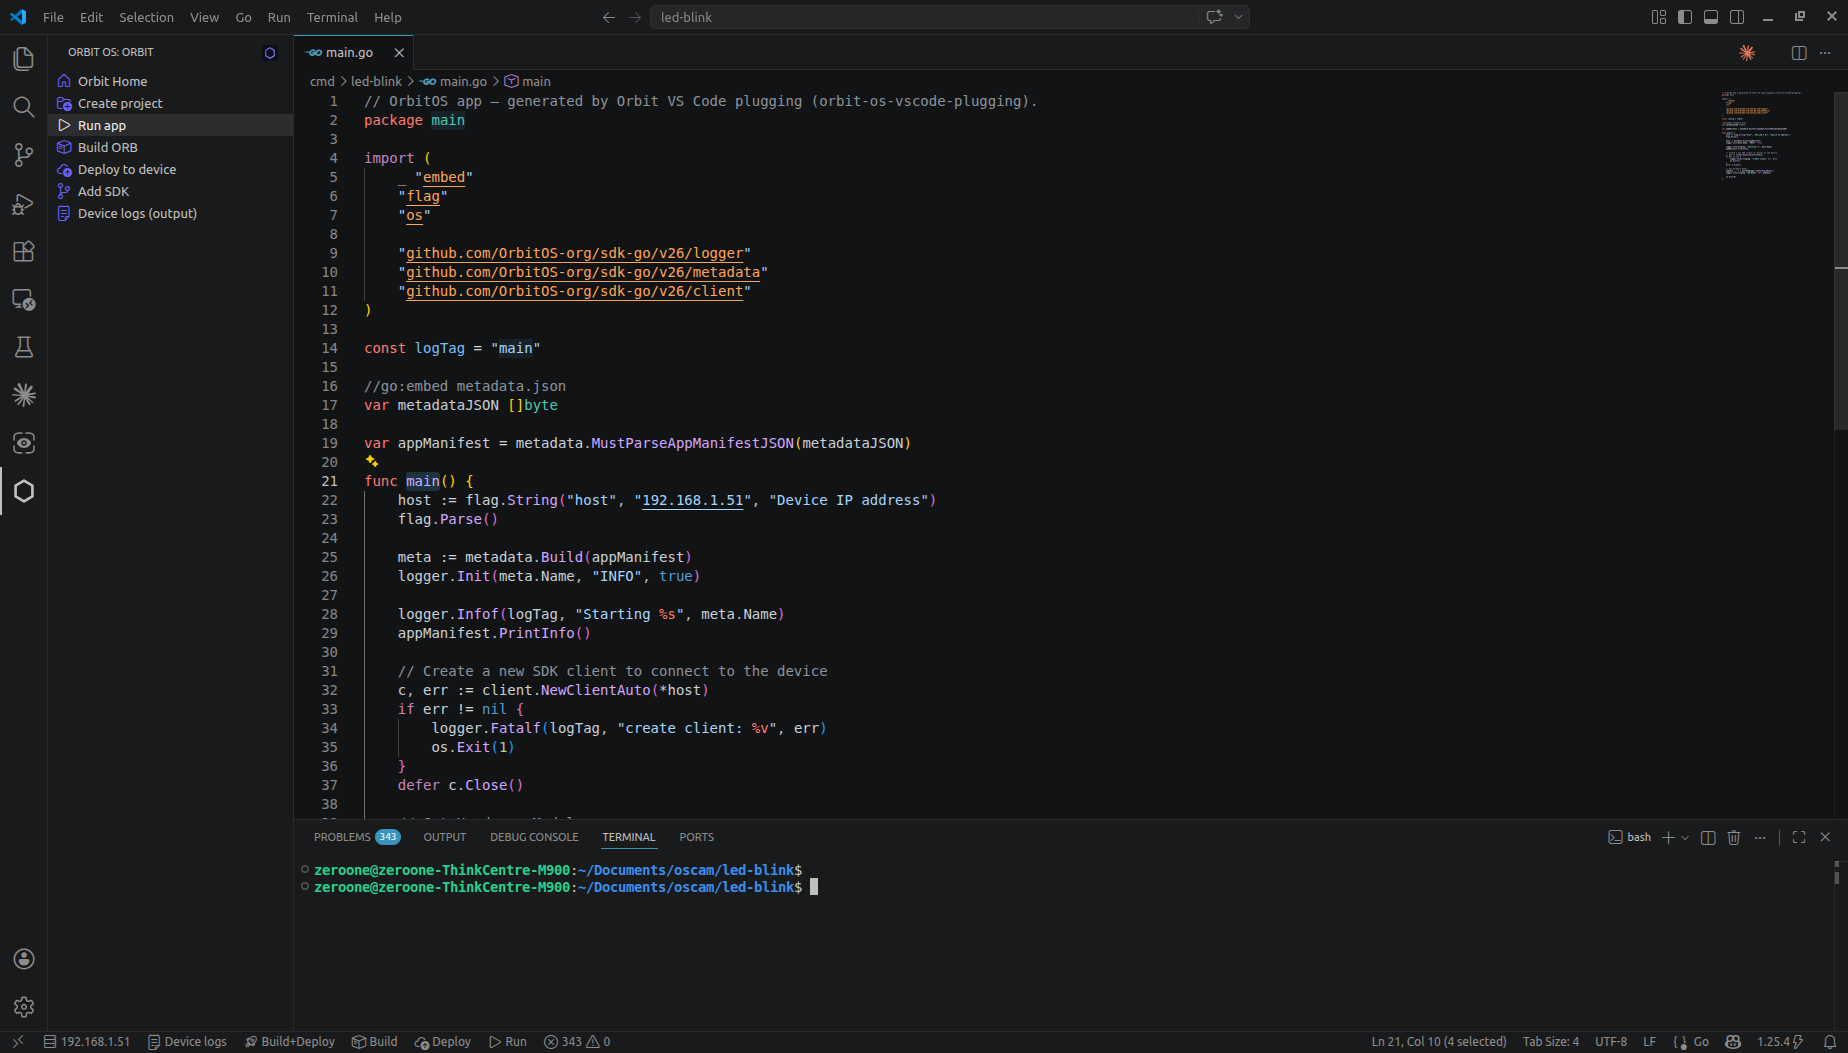
Run App
In the Orbit Studio sidebar, click Run App. Your code runs on your development machine and communicates with the device using the API over TCP/mTLS — all API calls go to real hardware, returning real data, in real time. This is realtime remote development: no packaging, no deployment, no flashing. Iterate directly against the device from your laptop.
The default example that ships with every new project connects to the device and prints the hardware model to the terminal — confirming the connection is working.
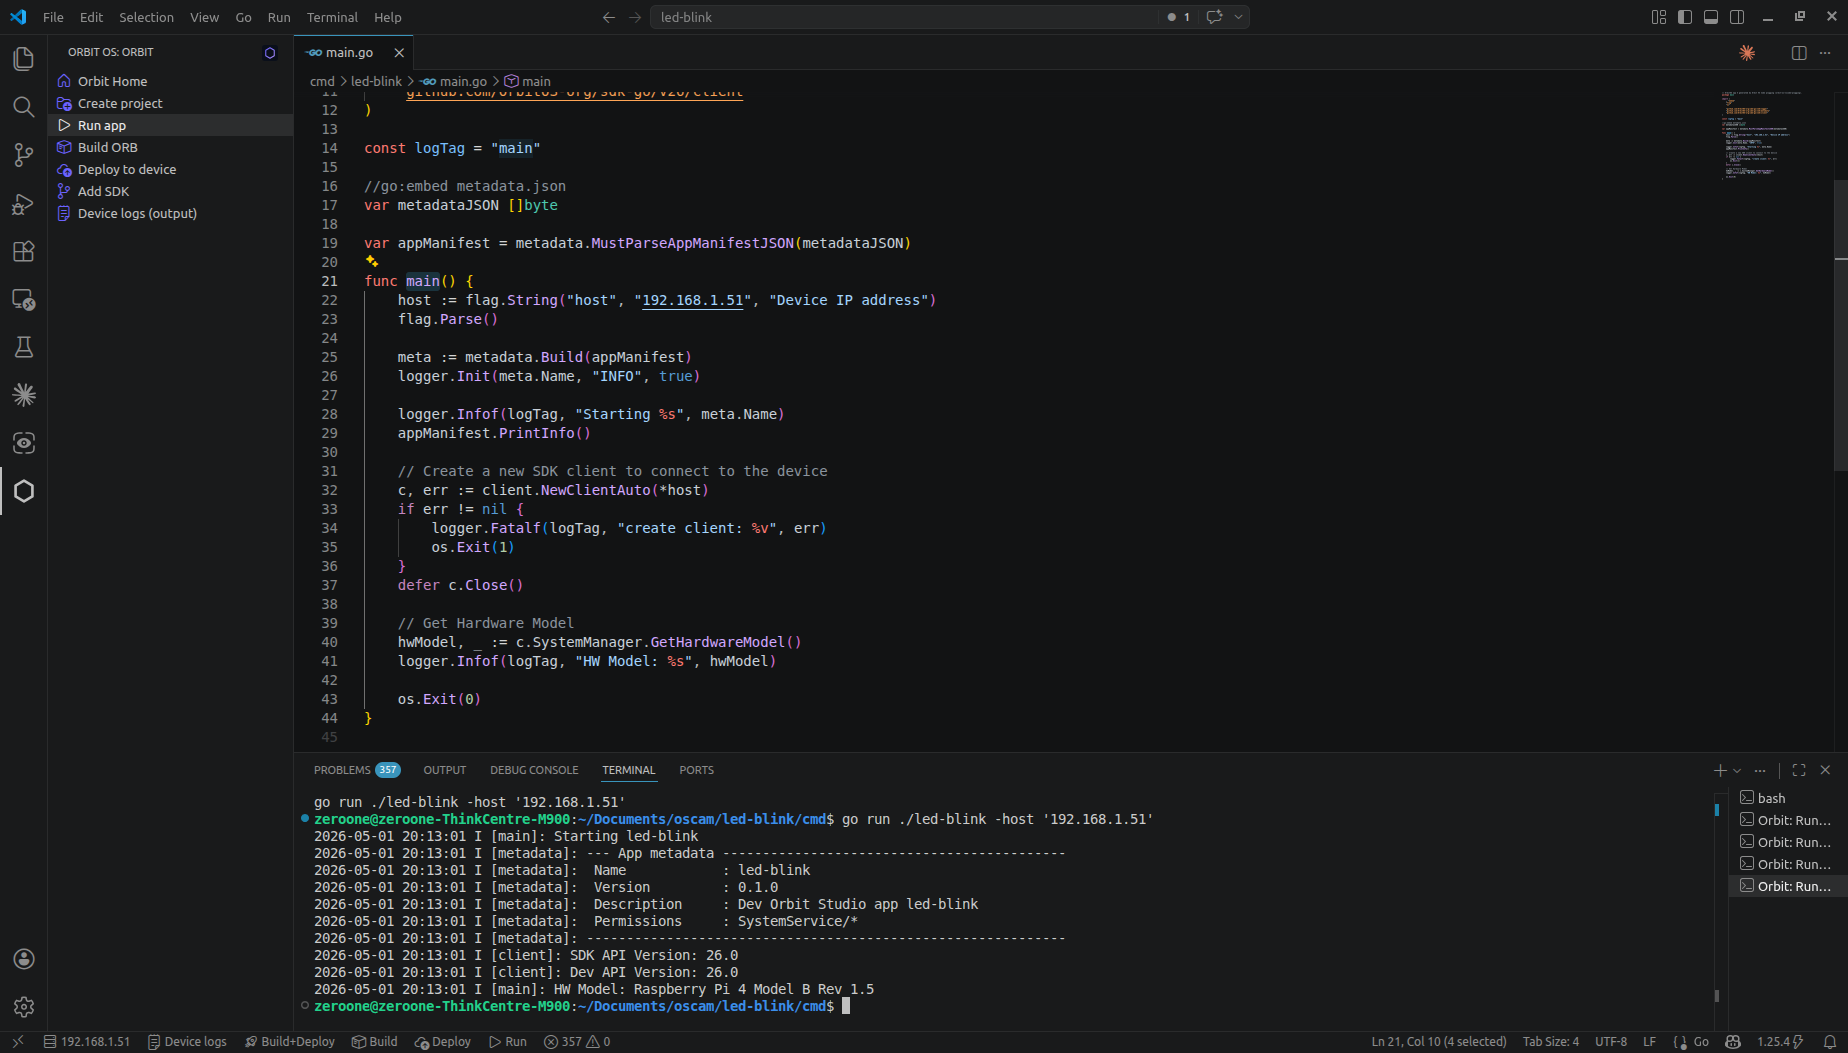
⚡ GPIO Blink — First App
This demo app shows how to control GPIO pins using the Orbit OS SDK. It uses gpio_manager.go — the SDK component responsible for managing and controlling GPIO hardware — as described in the SDK API Reference.
The app does two things: lists all available GPIO pins on the connected device, then blinks GPIO17 continuously at 1-second intervals — toggling it HIGH and LOW in a loop.
List available GPIO pins
To list all available GPIO pins on the device, the app calls GpioManager.ListPins() — returning the full list of pins exposed by the hardware.
Blink GPIO17
With the pin identified, the app sets its direction to OUTPUT using GpioManager.SetDirection(), then enters a loop that toggles the level between HIGH and LOW every second using GpioManager.SetLevel() — producing the blink.
The screenshot below shows the app running via Orbit Studio — the code executes on the development machine, the Raspberry Pi's GPIO17 blinks physically, and the terminal shows the full log: pin listing, hardware model, and the toggle output every second.
Deploy to Device
Once the app is tested and working, click Deploy in the Orbit Studio sidebar. With a single click, the extension generates the .orb package, signs it with a development certificate, and installs it directly on the device — no terminal, no manual steps.
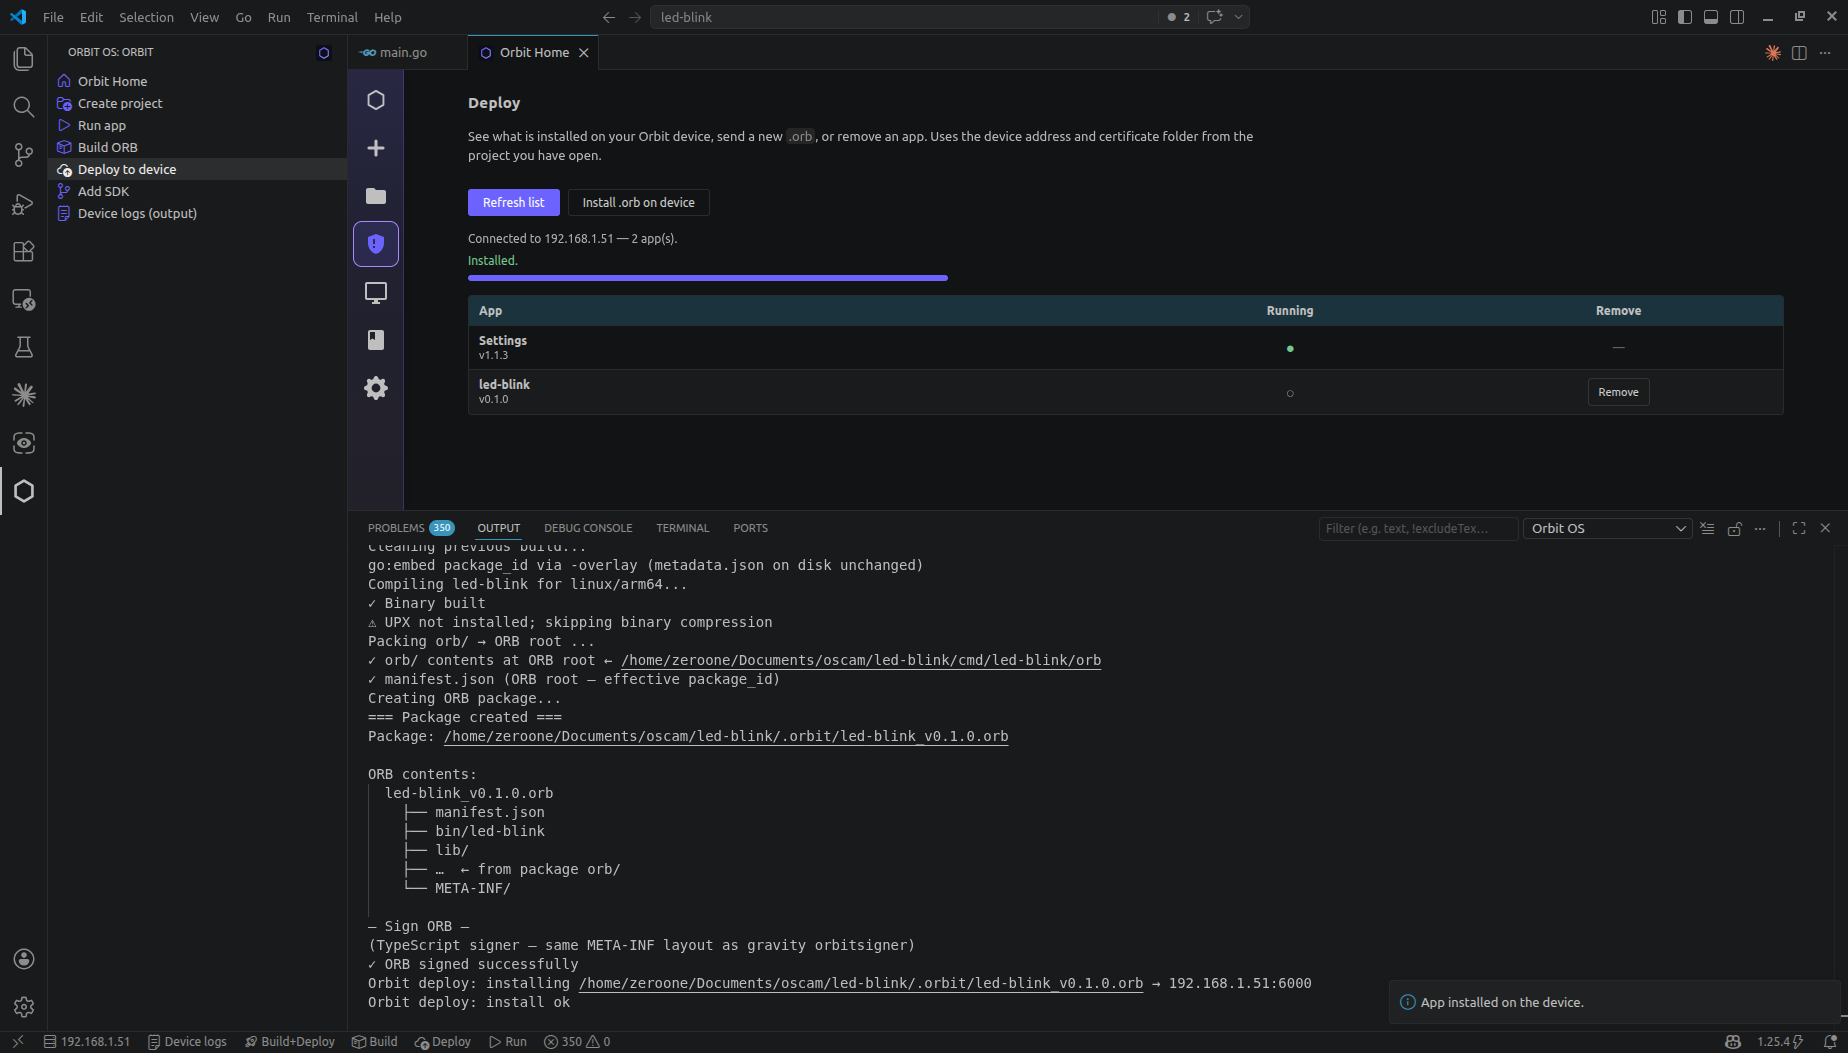
After deployment, the .orb is running inside the device — it's no longer your development machine driving the GPIO, it's the app itself running natively on the hardware. GPIO17 continues to blink, now fully autonomous.
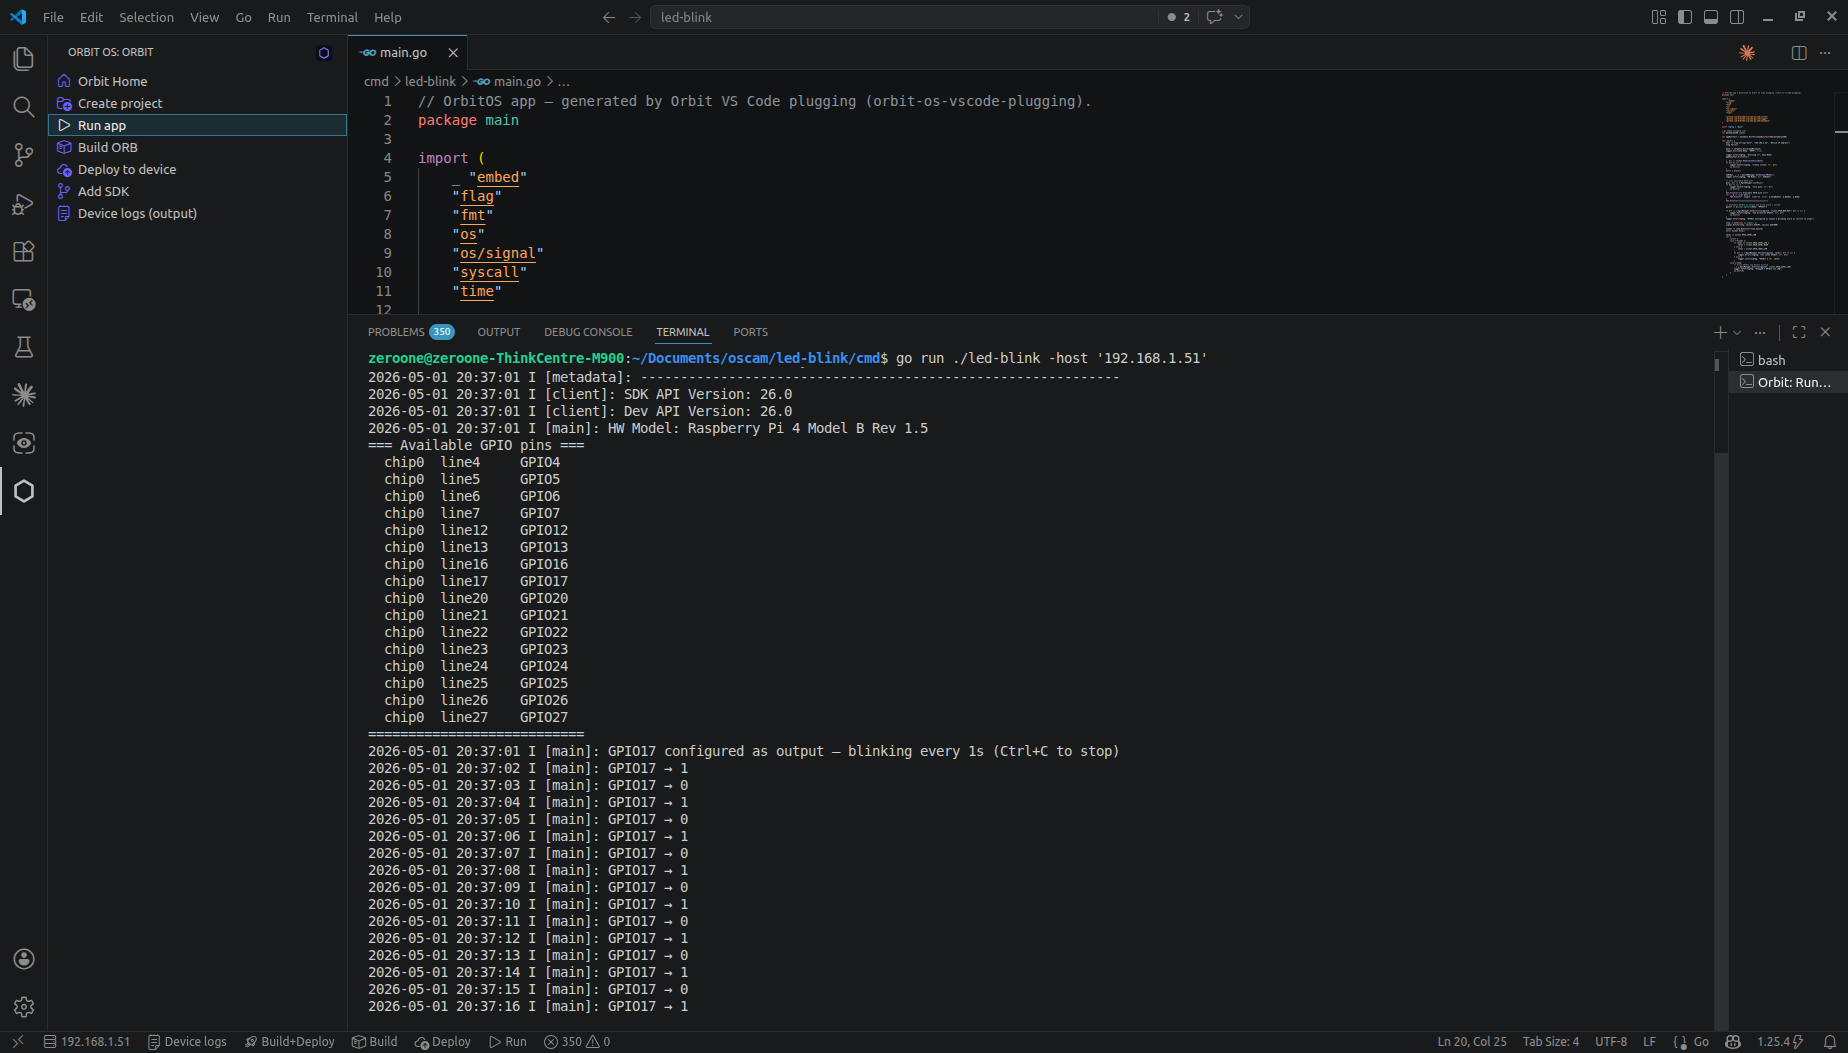
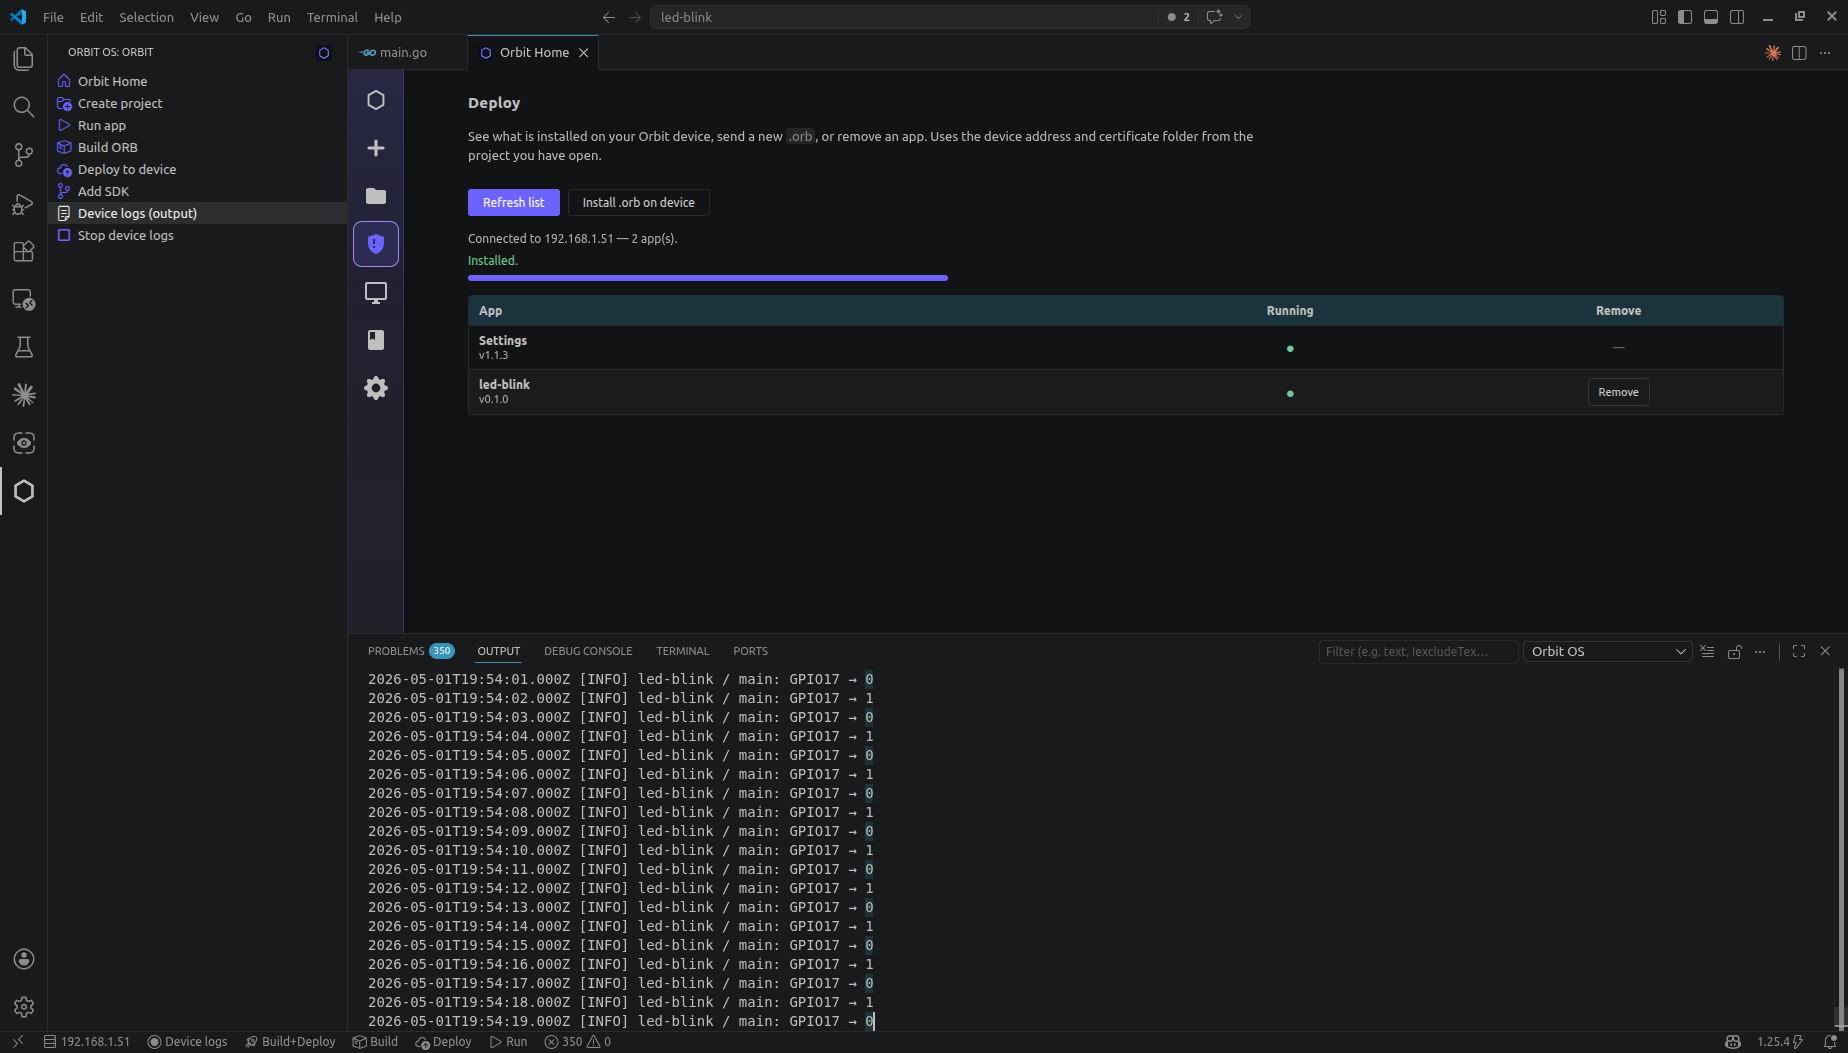
Real-time Device Log
With the app running on the device, Orbit Studio lets you stream its logs directly into the VS Code Output panel. In the extension, select Device Log — the terminal immediately starts showing the app's output in real time, straight from the device.
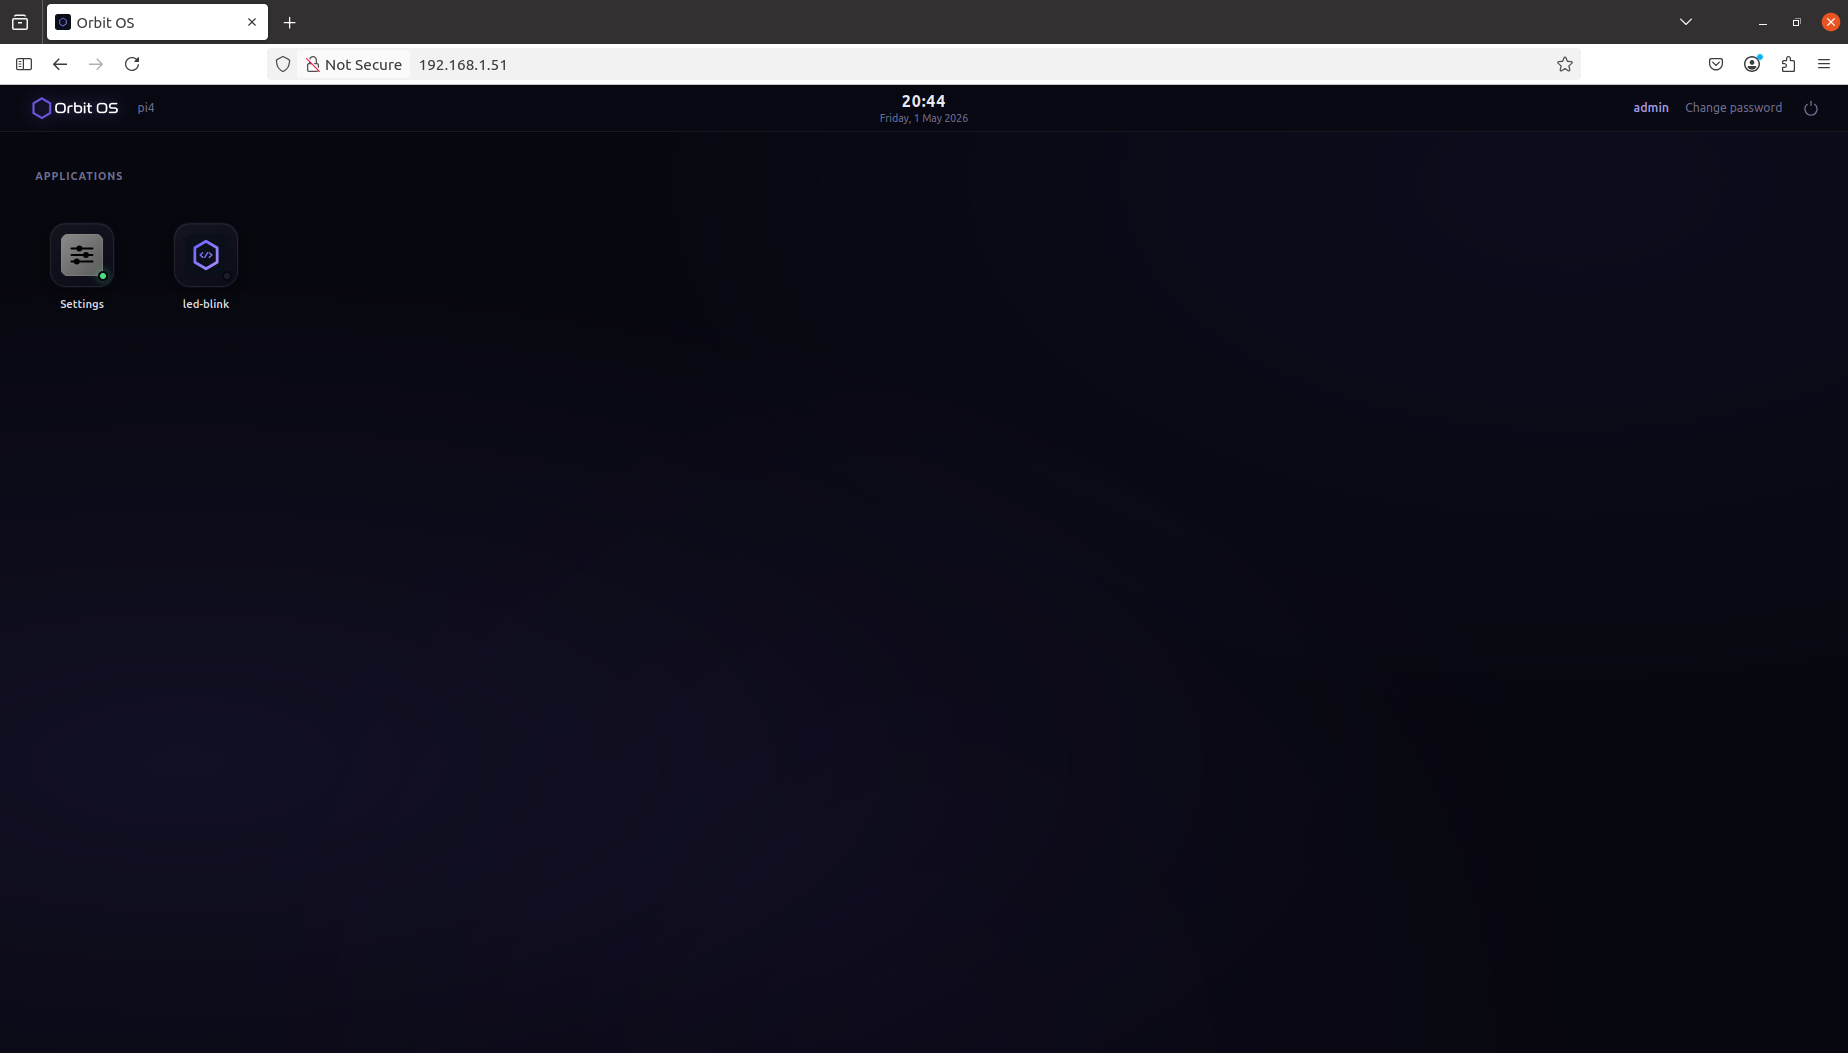
Open a browser and navigate to http://<device-ip> to access the Launcher. The led-blink app icon is now visible alongside the other installed apps.
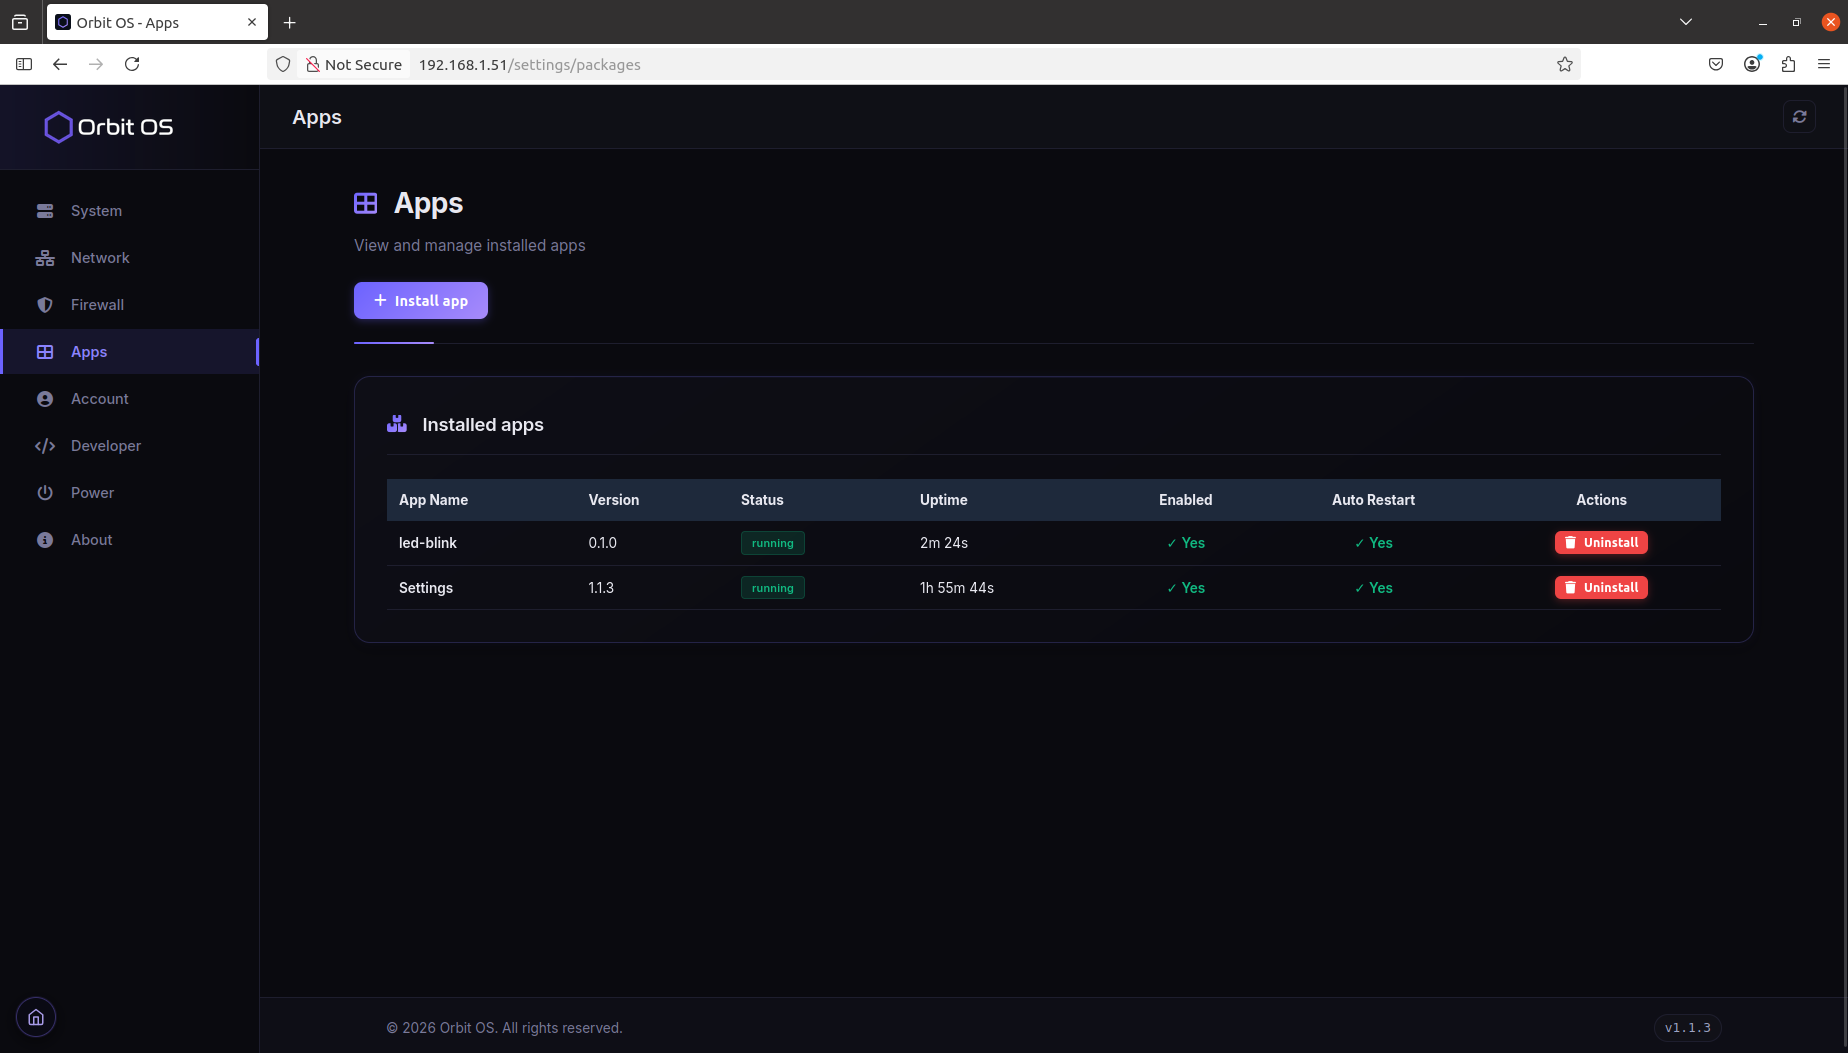
In the Launcher, go to Settings → Apps to see all installed apps. The led-blink app appears there with its status shown as running. From this view you can also uninstall it directly from the device.
From a blank project to a running app on real hardware — without SSH, without flashing, without manual file transfers. You created a project in Orbit Studio, ran it in realtime remote development mode against a live device, and deployed it as a signed .orb package with a single click. The app now runs autonomously on the device, managed by Gravity RT, visible in the Launcher, and controllable from Settings.